Tool |
|
Tool |
|
Product templates are used to export a surface and its metadata to multiple formats simultaneously. Templates also allow default property values to be defined for the selected output format.
You can create a new product template using the settings of an existing product template, or start from a blank template and customize your own.
All templates and their settings are saved to the rasterproducttemplate.xml file found in:
C:\ProgramData\CARIS\<CARIS application>\<version>\System
When creating a new template, the application will check this file to determine if there are existing product templates. If templates are found, the Reference Template dialog box is displayed, which lists the names of the existing templates. A new template created by referencing an existing template will have the same default values as the existing template.
Related commands:
• Export Raster Product: Perform an Export
• Export Raster Product: Edit a Product Template
• Export Raster Product: Delete a Product Template
Interface
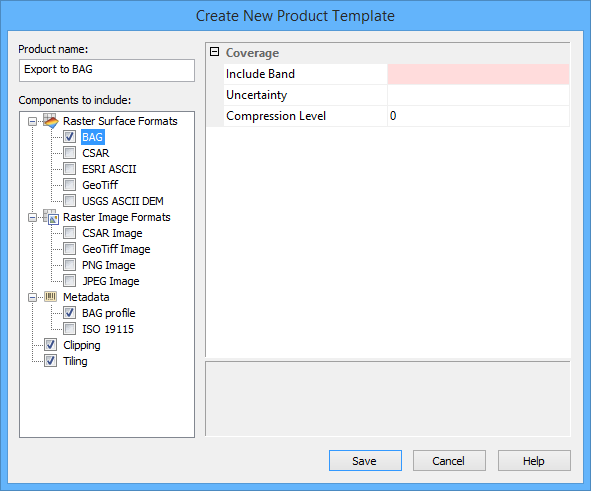
The Create New Product Template button opens the following dialog box.

Options | Description |
Product name | The name to assign to the product template. 1. Type a name in the field. |
Components to include | The components you want included in the product template. The right side of the dialog box will not display any fields until a component is selected. The available components are: • Raster Surface and Raster Image formats, which provide the available output formats. Multiple output formats can be included in a single product template. • BAG Metadata and ISO19115, which allow you to define metadata for the exported file. • Clipping, which allows you to export only a portion of the source data. • Tiling, which allows you to export the source data as multiple tiles of a user-specified size, rather than a single large file. See Clipping and Tiling for more information. At least one Raster format component must be included in the template. If the Clipping and Tiling components are included, they will be applied to all output formats generated by an export of the product template. 1. Click the check box of each component you want included in the template. |
Properties | The properties for the selected component. The available properties will differ based on the selected component. Each time a property is selected, a brief description of the property is displayed below the list of properties. Values entered here are saved as default values for the product template. Properties highlighted in red are mandatory when exporting, but can be left blank when creating a template. The highlighting will revert to the white background if a value is entered. |
Procedure
1. Click the New Product Template button.
2. If the Reference Template dialog box is displayed, select a template from the drop-down list, or select <Empty template> to start with a blank template and click OK.
The Create New Product Template dialog box is displayed.
3. Enter a Product name for the template.
4. Select a component so it is highlighted in the Components to include list.
5. Click the check box so that the component will be included in the template.
6. Define the properties for the component that you want set as default values.
7. Repeat steps 4 to 6 for each component you want included in the template.
8. Click Save to create the product template.
The template is added to the rasterproducttemplate.xml file in the system folder and you are returned to the Raster Product Export dialog box. The new template is added to the Output drop-down list and selected automatically.
