Menu | Edit > Active Settings |
Tool |
|
To add or remove components from a vessel:
1. Select the vessel in the Vessel window.
2. Select the Active Settings command.
Menu | Edit > Active Settings |
Tool |
|
The Active Settings dialog box appears, showing a check box for each type of component. If a box is checked, the component is included in the vessel file and displayed in the Vessels Window.
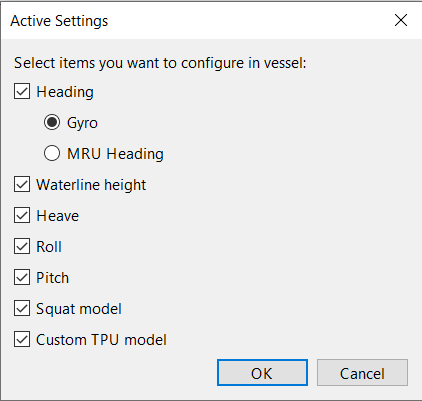
3. Check the boxes of the components that you want to include on the vessel, and clear the boxes of the components that you do not want to include.
If you deactivate components that contain attributes, those attributes will be permanently lost when you save the file. Vessel Editor will warn you that those attributes will be lost when you click OK in this dialog. |
• Heading: A sensor that detects the vessel’s heading. Select Gyro if the sensor is separate from the MRU (see Gyro) or MRU Heading if the sensor is part of the MRU (see Heading). The distinction between Gyro and MRU Heading is only used for visualization in the Vessels window, so it has no specific effect in the vessel file.
• Waterline Height: A measurement of the typical waterline on the vessel (see Waterline Height).
• Heave: A sensor that measures the vertical motion of the vessel, typically part of the MRU (see Heave).
• Roll: A sensor that measures the rotation of the vessel around its Y axis (see Roll).
• Pitch: A sensor that measures the rotation of the vessel around its X axis (see Pitch).
• Squat Model: A model that describes how the speed of the vessel affects how deeply it sits in the water (see Squat Model).
• Custom TPU Model: A model used to calculate the total propagated uncertainty (TPU) of each sounding taken by the instrument (see TPU Values).
The bathymetry sensor and Navigation components are always present, so they cannot be deactivated here.
4. Click OK.
The Vessels Window is refreshed to show the active components.
5. Click on the bathymetry sensor component in the Vessels window.
The bathymetry sensor is listed under its sensor name. When you create the bathymetry sensor it receives a default name such as “Teledyne - RESON SeaBat series (Teledyne s7k)”, but you can edit it in the Properties Window,
6. Adjust the values for the bathymetry sensor in the Properties and Attributes windows as needed.
These values are explained in Bathymetry Sensor.
7. Click on each Transmitter, Receiver, and XYZ (transducer) subcomponent under the bathymetry sensor component and set its values in the Attributes Window as needed.
These values are explained in Transmitter, Receiver, and XYZ.
8. Click on the Navigation component in the Vessels window.
9. Select the Add Navigation Sources command.
Menu | Edit > Add Navigation Sources |
Tool |
|
The Add Navigation Sources dialog box is displayed.
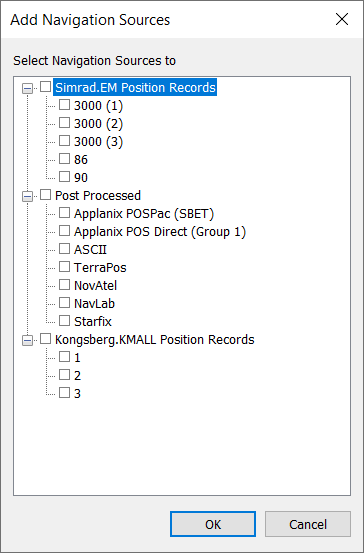
10. Select the sources for the project from the list of available formats.
11. Click OK.
Each of the selected sources is inserted as a subcomponent under the Navigation component.
12. Click on each source subcomponent under the Navigation component and set its values in the Attributes Window as needed.
These values are explained in Navigation.

