All new features must be assigned an acronym and attribute values before they can be digitized. If the display filter for the active layer is specific to a certain feature object acronym, that acronym will automatically be assigned to the new feature. This is the case, for example, for GeoPackage layers and Shapefile layers.
Procedure
The general procedure for creating features is:
1. Select one of the create commands.
The create commands are:
• Create Grid Areas / Create Grid Lines
• Create Area from Minimum Bounding Rectangle
2. Select an acronym, if necessary.
3. Set any attributes.
See Attributes.
4. Digitize the feature.
See Digitize.
The Change Selection command also uses the dialog boxes described here.
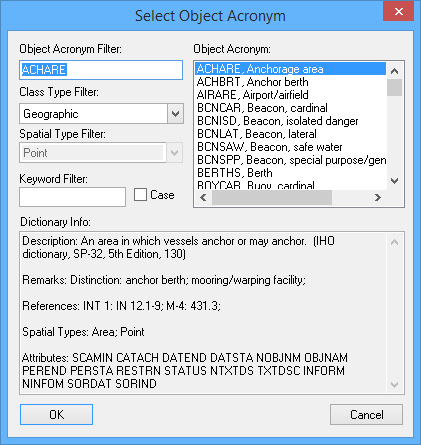
Select Object Acronym
The Select Object Acronym dialog box lists acronyms suitable for the feature being created. It is displayed when you select any of the above commands if the active layer is not unique to a specific acronym. One exception is the Create Sounding Feature command, which always generates a SOUNDG object.
Option | Description |
|---|---|
Object Acronym Filter | Type the first few letters of the acronym you are looking for. The Object Acronym list changes to match. |
Class Type Filter | Select a class from the list. The Object Acronym list changes to match. |
Spatial Type Filter | Select a spatial type from the list. The Object Acronym list changes to match. |
Keyword Filter | Filter on all fields that define the acronym. The Object Acronym list changes to display acronyms that contain your text anywhere in the definition. Case: • On: The filter is case sensitive. • Off: The case of the search term will be ignored. |
Object Acronym | The list of acronyms. This list changes as you use the filter options. Click on an item in this list to display its data in the Dictionary Info box. |
Dictionary Info | The acronym information. The information includes a description, attributes, and remarks. Information about attributes includes name, type, and values. |
5. [Optional] Use a filter to reduce the number of acronyms in the list.
6. Select an acronym.
7. Click OK.
Attributes
The Attributes dialog box is displayed after you select an acronym for the new feature. The title bar contains the acronym and name of the new feature. If the new feature is being created using the acronym of the active layer, this dialog box is not displayed. Instead, the Attributes window is populated with the attributes for the object acronym. All attribute values can be specified in the Attributes window while digitize mode is enabled.
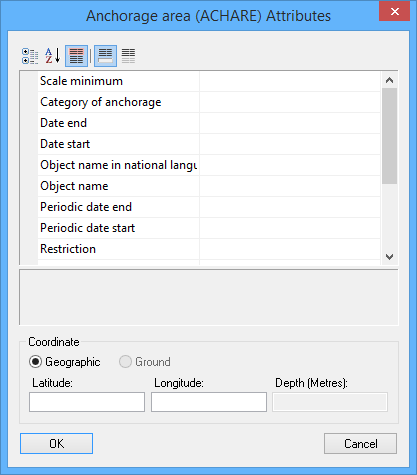
Column | Description |
|---|---|
Attribute name or acronym | The name, acronym, or both of the attribute. Set this in the Display > Attributes tab of the Options dialog box. |
Attribute value | The value assigned to the attribute. If the cell is blank, no value is assigned. If the value is red, it is mandatory but has not been defined. If it is green, it is mandatory and defined. If it is yellow, it depends on the value of another attribute. You can display the value as a name or a number. Set this in the Display > Attributes tab of the Options dialog box. For more information, see Attributes Window. |
The toolbar at the top changes the way attributes are displayed:
Tool | Description |
|---|---|
| Sort attributes by category. |
| Sort attributes in alphabetical order. |
| Always display mandatory attributes first, regardless of sort method. |
| On: Display a description of the selected attribute.
Off: Do not display a description. |
| On: Display only attributes with defined values. Off: Display all attributes. |
Attribute values can be entered using the methods described in Attributes Window.
Point features
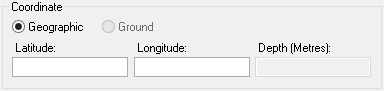
If the feature you are adding is a point or sounding, the Attributes dialog box contains a Coordinate section.
If you do not enter coordinates here, you specify the location by clicking in the Display window when you exit the Attributes dialog box. |
You can specify coordinate values for both point and sounding features. You can also specify the depth for soundings.
1. Select Geographic or Ground.
If you select Geographic, the coordinates are named Latitude and Longitude. If you select Ground, they are named Eastings and Northings.
2. Enter the coordinates.
3. Enter a Depth, if necessary.
4. Click OK.
If you did not enter coordinates, or if you are adding something other than a point or sounding, you must digitize the feature.


