![]() CARIS HPD Paper Chart Editor
CARIS HPD Paper Chart Editor
![]() CARIS HPD Product Editor
CARIS HPD Product Editor
![]() CARIS HPD Source Editor
CARIS HPD Source Editor
![]() CARIS S-57 Composer
CARIS S-57 Composer
![]() CARIS Paper Chart Composer
CARIS Paper Chart Composer
Menu | File > Import > Import Selected Objects > Superselection File > Import > Import Selected Objects > Selection |
Import selected vector features from a layer containing S-57 data into another layer, which can be a scratch or feature layer.
The features are added to the target layer and assigned new feature object IDs. External files are copied to the folder referenced by the externalFiles variable.
Both layers must be open.
Related commands:
• • | • • |
Interface
Option | Description |
|---|---|
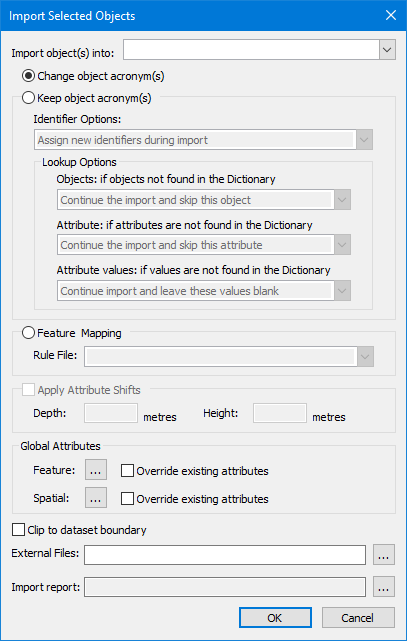
Import objects into | The layer or usage into which the objects will be imported. Select from the list. |
Change object acronyms | Change acronym and attribute values manually. |
Keep object acronyms | Retain existing acronym and attribute values. • Identifier Options: Choose to assign new feature object IDs or use existing object IDs. Select from the list. • Use existing identifiers (skip object if identifier already in use). • Use existing identifiers (assign new object identifiers if identifier is already in use). • Assign new identifiers. • Lookup Options: Choose what to do if objects, attributes, or attribute values in the imported data are not found in the dictionary. Select from the list |
Feature Mapping | Use an XML mapping file to assign acronyms and attributes to objects. This can be a one-to-one conversion, one-to-many conversion, or a many-to-one conversion. Geometry shape conversion is supported for lines and closed shapes when mapping from DGN, Shapefile or GML files to S-57 or HOB files. Select the file from the list. |
Apply Attribute Shifts | Shift depth or height values for attributes with sounding or vertical datum types. This option is active only if you select Keep Object Acronyms or Feature Mapping. • Depth: Type the depth shift value in the box. Put a plus sign (+) in front of the value to make it deeper or a minus (-) sign to make it shallower. • Height: Type the height shift value in metres in the box. Put a plus sign (+) in front of the value to make it higher or a minus (-) sign to make it lower. |
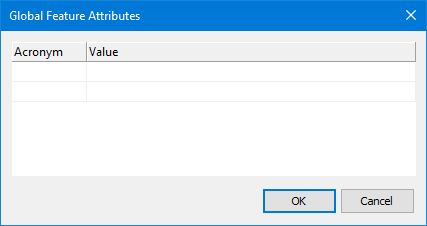
Global Attributes | Attributes that can be applied to all features during import. You can choose feature attributes, spatial attributes, or both. Feature: To apply global feature attributes: 1. Click browse (...). The Global Feature Attributes dialog box is displayed.
2. Select an attribute acronym from column 1. 3. Enter a value in column 2. 4. Click OK. 5. Enable Override Existing Attributes to replace values if the same attributes are used in the imported features. |
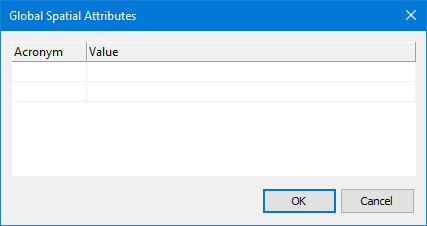
Spatial: To apply global spatial attributes: 1. Click browse (...). The Global Spatial Attributes dialog box is displayed.
2. Select an attribute acronym from column 1. 3. Enter a value in column 2. 4. Click OK. 5. Enable Override Existing Attributes to replace values if the same attributes are used in the imported features. | |
Clip to dataset boundary | On: Only features that fall within the dataset boundary are imported. Line or area features that extend beyond the boundary are clipped at the boundary. Off: All features are imported in their entirety. |
External Files | If the dataset contains external files located in a different directory (for example, text and multimedia files referenced by the TXTDSC and PICREP attributes), use this option to select the directory where these files are located External files will be copied to the directory referenced by the 1. Click browse (...) and select a path, or type the path directly in the text box. |
Import report | To generate a report of the import, click browse (...) and select a path and file name for the report. |
Procedure
1. Select the layer containing the data to be imported.
2. Select one or more features.
3. Select the Import Selected Objects command.
The Import Selected Objects dialog box is displayed.
4. Select the layer to which data is to be imported.
5. Select an import option:
• Change object acronym(s)
• Keep object acronym(s)
• Feature Mapping
6. Set any other necessary options.
7. Click OK.
The selected features are imported into the target layer.