Tool | CZMIL > 10 - Export CZMIL to LAS (Tools window) |
The Export CZMIL to LAS process model is used to export a CZMIL dataset to the LAS data format.
CARIS Batch process: Export CZMIL to LAS
Interface
The options in this process model include:
Option | Description |
|---|---|
Survey File | The name and location of the survey file containing the survey lines of CZMIL data. If a survey file is open in the application, a drop-down list is also provided for this option. The drop-down list allows a survey layer open in the application or the current selection (if a survey line is selected) to be used as the input survey. 1. Click the browse button (...) to launch an Open file dialog box. 2. Navigate to the relevant file. 3. Click Open. |
Input Channels | This option is used to select the input channels that will be exported to the resulting LAS files. All channels are selected by default and will export to a single file. If only some channels are selected, each channel will export to a separate file. 1. Expand the option. 2. Click to populate the check box of each channel to be exported. |
Bands to Include | Select the bands to include in the export to LAS. The drop-down list has the following options: • All: This option will export all bands in the input to the resulting LAS files. • Minimum: This option will export a default limited set of bands to the resulting LAS files. The bands include: • Classification • Depth • Intensity • LAS_Flags • Number_Of_Returns • Point_Source_ID • Return_Number • Time • User-defined: This option is used to manually select the bands that will be included in the export. When this option is selected, the User-defined field will be enabled to select the relevant bands. Note: If the Point_Source_ID band is included, the last 5 characters of the CPF filename are exported as the point source ID values, if the point source ID is not otherwise specified and if the last 5 characters in the CPF filename represent a number. Otherwise they are exported as 0. |
User-defined | This option is used to manually select the CZMIL bands to export to the LAS files. This option is only enabled when the Bands to Include option is set to User-defined. 1. Click the Plus button (
2. Type the name of the CZMIL band in the Input Name field. 3. Expand the drop-down list and select the relevant Output Name option from the list. This is the name that will assigned to the band in the output file. 4. Click OK. The band will be added to the list of selected bands. The order of the bands in the list can be adjusted using the Up- and Down-Arrow buttons beside the list. The order of the bands in the list control the order in which they are exported to the output file. The Remove button |
Override output folder for LAS files | Enable this option to specify an output location for the resulting LAS files other than the default location. If not enabled, the LAS files will be saved to a Lidar sub-folder in the location of the survey file. |
LAS Folder | The location in which the LAS files will be saved if the Override... option is enabled. This option is only enabled if the Override... option is enabled. 1. Click the browse button (...) to launch a Select a folder dialog box. 2. Navigate to the relevant location. 3. Click Select Folder. |
Waveform | Enable this option to export the waveforms for each point to the Waveform Data Packets (WDP) file with the same location and name of the exported LAS file. Exporting waveforms requires that anchor points be present in the data and it requires each subsequent point in the same channel to be valid in order to calculate the parametric XYZ values. If these criteria are not met, the waveform data is not included with the export. Note: Rejected points are not included when exporting waveform data. This means that the point count in the LAS file will differ from the point count in the input CZMIL data, affecting the mapping index of the points. For this reason, neither the Include Rejected nor the Include Mapping Index options can be used if this option is enabled. |
Include Rejected | Enable this option to include data with a Rejected status in the exported LAS file. If not set, all data with a Rejected status will be ignored in the export and not stored in the LAS file. |
Include Mapping Index | Enable this option to export a unique mapping index value for each point for later use as an identifier in the Update CZMIL from LAS process. See Update CZMIL from LAS for information on this process. |
Clamped Return Number | Enable this option to manually specify the value that will be used for Return Numbers. This may be required if the number of returns in the CPF files is larger than what is supported by the LAS version. CPF files support up to 31 returns. LAS 1.4 supports up to 15 returns. When specifying the value to use: • If the LAS point type is less than 6, the number for returns must be between 1 and 5 inclusive. • If the LAS point type is greater than or equal to 6, the number for returns must be between 1 and 15 inclusive. The number that is specified will indicate which return value will be duplicated when the return number is greater than the value supported by the LAS version. All returns after the duplicated number will be mapped to other return values to fit within the supported number of returns. For example, if the CPF file contains return numbers 1 to 20 and is being exported to LAS 1.4 with a Clamped Return Number of 8, returns after 8 will be duplicated as 8 until the remaining returns fit within the limit of 15 returns, such as 1, 2, 3, 4, 5, 6, 7, 8, 8, 8, 8, 8, 8, 9, 10, 11, 12, 13, 14, 15. If this option is not set, the largest supported value is used for the duplicate if the existing Return Number is too large (e.g. 1, 2, 3, 4, 5, 6, 7, 8, 9, 10, 11, 12, 13, 14, 15, 15, 15, 15, 15, 15). |
Include Scan Angle Direction | Enable this option to include the scan angle direction when exporting to LAS. This will populate the Scan Direction Flag in the resulting LAS data as either a 1 or a 0: • 1 = cosine(corrected_scan_angle) > 0 • 0 = cosine(corrected_scan_angle) < 0 The corrected scan angle is calculated as |
Include Approximate Scan Angle | Enable this option to include the approximate scan angle across track of the CZMIL scanner when exporting to LAS. The scan angle is calculated as 20 * the sine of the circular scan angle. If the LAS point data format is six or higher, it is stored in the Scan Angle field; otherwise, it is stored in the Scan Angle Rank field. |
Include Circular Scan Angle | Enable this option to include the corrected CZMIL 360 degree circular scan angle when exporting to LAS. This is exported as extra bytes in a field called Circular Scan Angle. This is calculated as raw_scan_angle + prism_yaw_angle. |
Suppression Factor | The amount of pulse reflection suppression to be applied. Higher values may suppress too much, resulting in flat-lining at the location of the reflection pulse. A lower value may not completely remove the reflection pulse. An optimum factor has to be determined for each system. The default value is 0. |
Point Record Format | The point record format to use for point data records in the output. Formats 0 to 10 are available with LAS 1.4. 1. Click the check box to enable the option. 2. Type a value in the field. Note that the point record format selected must be compatible with the LAS version being used for the export. |
LAS Version | The LAS version to use to create the output files. 1. Click the check box to enable this option. 2. Select a version from the drop-down list. |
Coordinate Precision | The number of decimal places to include in coordinates in the output. 1. Click the check box to enable the option. 2. Type a value in the field. |
Elevation Precision | The number of decimal places to include in elevation values in the output. 1. Click the check box to enable the option. 2. Type a value in the field. |
Use GPS Week Time | Use GPS Week Time format when storing time values in the output. 1. Click the check box to enable the option. |
Override Classification File | A mapping file for custom classification names and identifiers to use for the export overriding the default mapping defined in the LAS standard. 1. Click the check box to enable the option. 2. Click the browse button (...) to launch an Open file dialog box. 3. Navigate to the relevant file. 4. Click Open. A custom mapping file must be created in order to use this option. |
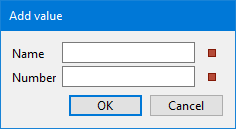
Override Classification Mapping | A custom classification mapping to apply to a single value during export, overriding the mapping defined in the LAS standard. Multiple overrides can be specified and arranged in the list in the order that they should be applied during export. 1. Click the Plus button (
2. Type a classification name in the Name field. 3. Type a classification number in the Number field. 4. Click OK. The classification mapping will be added to the Override list. 5. [Optional] Define additional classification mapping overrides. 6. [Optional] Use the Up- and Down-Arrow buttons to adjust the order of the items in the list. The Remove button |
Log process information | Create a log file containing the options specified when the process was run. The location of the log file is determined by the Logs setting in Tools > Options > Files and Folders. 1. Click the check box to enable this option. |
Procedure
1. Double-click the Export CZMIL to LAS process model in the Tools window.
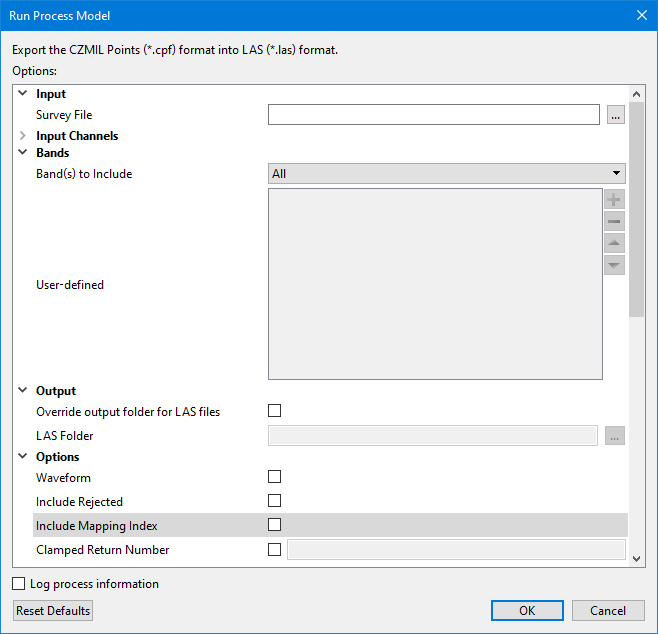
The Run Process Model dialog box is displayed, populated with the Export CZMIL to LAS process model.
2. Navigate to the relevant Survey File.
3. Select the Input Channels to include in the LAS files.
4. Select the bands of CZMIL data to be exported.
5. Specify any other necessary options.
6. Click OK.
A progress dialog box is displayed providing progress information as the data is exported. Similar information is also reported in the Output window.
7. When finished, click the Close button to close the dialog box and complete the process.
 ) to launch the Add Value dialog box.
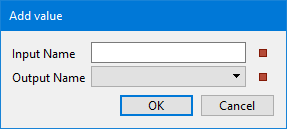

 ) to launch the Add Value dialog box.