Menu | Tools > Engineering Analysis > Shoals > Import from Database |
Tool |
|
Menu | Tools > Engineering Analysis > Shoals > Import from Database |
Tool |
|
The Import from Database command is used to import shoals from a selected database. The database from which the shoals are imported is controlled by your Shoal Record Association (SRA) file. This file controls the database from which the shoals will be imported and the attribute mapping settings for the import. To edit the SRA import file, see Edit Record Association File.
When the shoals are imported, a .shl file will be created to store the shoals on your local machine. By default, the file will be saved to the Windows Temp folder the first time the command is run.
C:\Users\<username>\AppData\Local\Temp
Related commands:
Interface
The Import from Database command uses the following dialog box.
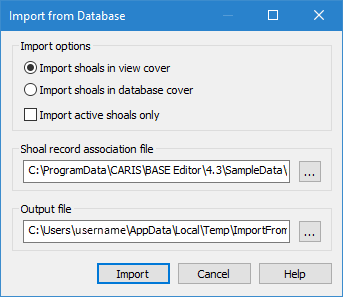
Option | Description |
|---|---|
Import shoals in view cover | Select whether to import all shoals in the database defined in the SRA file, or only the shoals in the database that are within the area currently displayed in the Display window. This option imports only shoals in the current view. |
Import shoals in database cover | Select whether to import all shoals in the database defined in the SRA File, or only the shoals in the database that are within the area currently displayed in the Display window. This option imports all shoals in the database. |
Import active shoals only | Select this option to import only shoals with a status of Active to ensure only current shoals are applied. This option is used in combination with the selected Import...cover option. |
Shoal record association file | The SRA file to use for the import. 1. Click the browse button (...) to navigate to and select an SRA file. |
Output file | The name and location for the resulting .shl file. 1. Click the browse button (...). 2. Navigate to a location for the file and enter a file name. 3. Click Save. |
Procedure
1. Select the Shoals layer in the Layers window.
2. Select the Import from Database command.
The Import from Database dialog box is displayed.
3. Select the relevant Import options.
4. [Optional] Select a different SRA file, if desired.
5. Define a name and location for the new file.
6. Click Import.
The selected shoals are imported. A layer is added to the Layers window with the assigned name and the .shl file is created in the specified location.
