Menu | View > 2D View Properties |
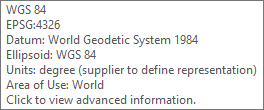
Status bar | (coordinate reference system) |
Select a coordinate reference system (CRS) for the current data.
Coordinate reference systems represent an area of the globe on a flat surface. Projecting features of a spherical earth onto a flat map usually causes some or all of the features to be distorted. For example, the features may be stretched in one direction, or they may appear relatively larger than features in other areas of the map. Selecting a projection appropriate for the area being viewed helps to minimize the distortion.
A CRS is based on entries in a set of support files, which are user configurable. By default, CARIS applications are setup with the projections and datums defined by EPSG, a global standard, as well as a number of custom projections and datums that are known to have been used by organizations around the world. It is possible to add custom entries; see the Support Files Guide for more information. The CRS dialog boxes also store recently used values and support setting favourites; see below for more information.
Related commands:
• Use Coordinate Reference System
Interface
The CRS selection dialog box is accessible from a number of locations. The behaviour of the dialog box differs depending the location from which it was launched. The options are:
• 2D View Properties command: this command is accessible from the View menu and is used to define various display settings for the 2D View, including the CRS of the view.
• CRS value in the status bar: this is the current CRS of the view and when clicked, is also used to change the CRS applied to the view.
• Displayed automatically: the dialog box is displayed automatically when opening a file that either:
• does not store the CRS internally, or
• the CRS stored in the data cannot be identified by the application.
In these instances, this tool is used to select the CRS and units to apply when opening the data.
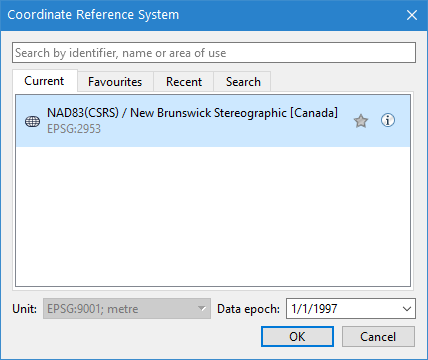
The dialog box contains the following fields:
Tab | Displays |
|---|---|
Current | The current coordinate reference system of the view. |
Favourites | Any coordinate reference system that has been marked as a favourite. |
Recent | Recently used coordinate reference systems. |
Search | Coordinate reference systems that match the search criteria entered in the search field. The tab is renamed to Search Results once a search has been performed. |
Unit | The horizontal units of the CRS. The default units for the CRS are selected by default. For projected custom CRS, the default unit is metres. This setting can only be changed if • the dataset has a non-EPSG CRS, • the dataset does not store the CRS in the data, such as DXF files, or • the application does not read the CRS from the data. If the units are changed, the data is still defined in the selected CRS but with the position coordinates scaled based on the selected units. This option is only enabled when the dialog box is launched from the Properties window or when a file is first opened that either does not contain a CRS or contains a CRS that the application cannot identify. |
Data epoch | The data epoch setting is used to identify when the data in the data source was collected. This information is required to accurately apply transformations when applying a coordinate reference system that uses time-dependent transformations to account for the movement of the Earth’s crust. This setting will default to the date at which the datum was created for the current CRS. If this setting is not available, it will default to January 1 of the current year. When this setting is used, the Details tab of the advanced coordinate reference system Information dialog box provides the epoch that was applied, as well as details of each step of the multi-step transformations. If the selected CRS does not use time-dependent transformations, this field is not available. |
Each coordinate reference system has two icons displayed on the right side of the dialog box. These icons are displayed when you click on or hover over a coordinate reference system in a tab. If a system is marked as a favourite, the Favourite icon is persisted at all times in all tabs.
Icon | Command | Description |
|---|---|---|
| Favourite | This button is used to identify favourite or frequently used reference systems. If a reference system is identified as a favourite, the icon is yellow and that reference system is listed on the Favourites tab. Otherwise the icon is grey. 1. Click the Favourite icon to add the reference system to the Favourites tab. 2. Click the icon a second time to remove the system from the favourites. |
| Info | This icon is used to display information about the system. If you hover over the icon, a tooltip displays information about the coordinate reference system.
If you click the icon, the advanced coordinate reference system Information dialog box is displayed with more details. See Advanced Coordinate Reference System. |
Search
The search box is used to search for coordinate reference systems using a text string. Strings are found if they appear in the identifier, the reference system name, or the area of use.
To search for coordinate reference systems:
1. Type a string in the Search box.
Results are displayed in the Search Results tab.
2. Press <ESC> to clear the search box.
Advanced Coordinate Reference System
The Coordinate Reference System dialog box displays detailed information on the selected reference system, including names, major components, and values. This information is read-only and cannot be modified.
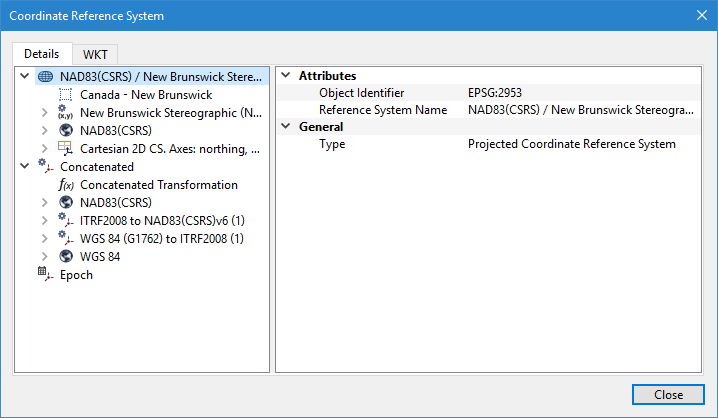
This dialog box contains these tabs:
Tab | Description |
|---|---|
Details | This dialog box displays detailed information on the selected reference system, including names, major components, and values. This information cannot be modified. The nodes of the coordinate reference system are displayed in the list on the left. 1. Click on a node. Node properties are displayed on the right. |
WKT | This tab displays the coordinate reference system as a WKT (Well Known Text) string. You can select and copy this string using the pop-up menu. |
Procedure
1. Access the CRS selection dialog box from either the 2D VIew Properties command or the CRS field in the status bar.
The CRS selection dialog box is displayed.
2. Select a coordinate reference system using one of the following methods:
• Select the Favourites tab and select a reference system from your list of favourites.
• Select the Recent tab and select a recently used reference system.
• Type a string in the Search box and select a reference system returned in the Search Results tab.
3. Click OK.
You can also double-click a coordinate reference system in any of the tabs. This will close the dialog box and apply the selection. |
The selected reference system is applied to the view.