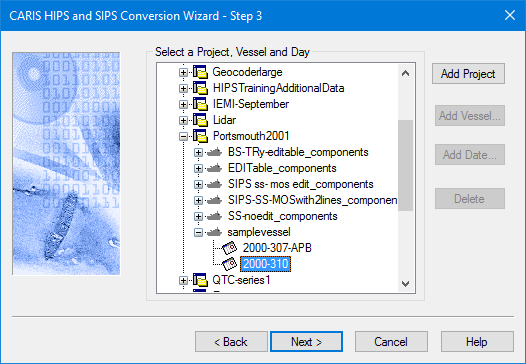
Use this dialog box to select the destination Project, Vessel and Day folders into which your converted data will be saved.
1. Click the Expand (+) icon to expand the Project file tree so that a Day folder is visible.
2. Click the Day folder so it is highlighted.
3. Click Next.
To select an existing project that is not listed in the current file tree:
1. Right-click in the data tree area of the dialog box.
2. Select Connect To… from the pop-up menu.
3. Name the new project folder and use Browse to set the path to the new data directory.
4. Click OK.
To create a new project:
1. Click Add Project and follow the steps to New Project.
Add Vessel or Day
You can also use this dialog box to add Vessel or Day folders to an existing project, or to delete empty folders.
1. To add a vessel to the selected project, make sure the project directory is highlighted and click Add Vessel.
The Available Vessels dialog box is displayed.
2. Select a vessel folder and click OK.
The new Vessel folder is displayed in the selected project directory.
To add a Day folder to the project:
1. Click the Vessel folder to expand it and click Add Day.
The Calendar dialog box is displayed.
2. Select a year/month/day from the calendar, and click OK.
A Day folder with the selected date is stored in the Vessel folder.
Remove folder
3. To remove an empty Day or Vessel folder from the wizard, highlight the folder and click Delete.
To add a Project to the root directory:
1. Click Add Project to open the New Project wizard, and follow the steps in the wizard.
When you have finished creating a new project for your data, you will be returned to the Conversion wizard to continue the conversion process.