Menu | Tools > Features > Create Features From > Superselection/Selection |
The Create Features from Selection command is used to create point and sounding type features using the elevation values from a selection of existing coverage data. The source data can be in the form of a raster surface, point cloud or variable resolution surface.
Related commands:
• Create Soundings Inside Contours
Interface
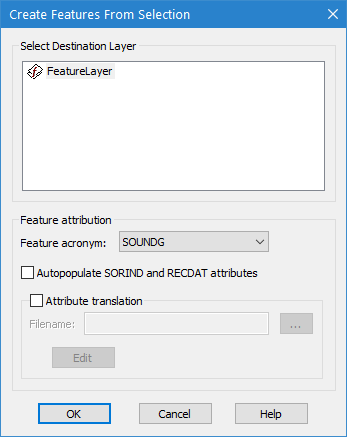
The Create Features from Selection command uses the following dialog box.
Option | Description |
Select Destination Layer | The feature layer in which to create the new features. All feature layers currently open in the application are listed in the Destination Layer field. New features will be created in the selected layer. The first layer in the list is selected by default. |
Feature attribution | The Feature attribution fields allow you to define the type of features to create and metadata values to assign to the features. |
Feature acronym | The feature object acronym to use to create the new features. The drop-down list for this field is populated according to the feature catalogue of the selected destination layer. The default selection will be the first sounding type feature in that catalogue. |
Autopopulate SORIND and RECDAT attributes | The source (SORIND) and date (RECDAT) attribute values for the new features are populated automatically if this option is enabled. |
Attribute translation | This option allows a translation file (.bsst) to be applied to the data to map attribute values from the source data to the new feature objects. You can choose to use an existing translation file or create a new one. |
Filename | The BSST translation file to use for attribute mapping. An existing file can be used or a new file can be created. 1. Click the browse button (...) to open or create a file. 2. If using an existing file, navigate to the file and select Open. If creating a new file, navigate to the location in which to store the file, enter a name for the file in the File name field and click Open. If editing the selected file or defining settings for a new file, you must launch the Edit Translation File tool using the Edit button. |
Edit | Launch the Edit Translation File tool to edit the settings of the selected translation file. If a new file is being created, this tool is used to define the settings in the new file. See Edit Translation File for more details on this tool. |
Procedure
1. Select the parent layer of a raster surface or point cloud in the Layers window.
2. Select the desired source data in the Display window.
3. Select the appropriate Create Features From command, depending on the number of nodes or points selected.
The Create Features From Selection dialog box is displayed.
4. In the Select Destination Layer field, select the feature layer in which you want to create the new features.
5. Select the Feature acronym for the new feature objects.
6. [Optional] Define the feature attribute mapping settings.
7. Click OK.
New features are created on the destination layer using the object acronym and attributes specified.