![]() CARIS HPD Paper Chart Editor
CARIS HPD Paper Chart Editor
![]() CARIS HPD Source Editor
CARIS HPD Source Editor
![]() CARIS S-57 Composer
CARIS S-57 Composer
![]() CARIS Paper Chart Composer
CARIS Paper Chart Composer
Menu | Create > Text > Point Justified/Curved Text |
Tool |
|
Add a text feature to a layer.
If you want to add cartographic text to your HPD source, you must run the SQL script as described in Add Cartographic Features to Source. |
If you do not run the script, you can only add text as a temporary change feature (tmpchg). See the Create Temporary Change command. |
You can set the formatting options in the toolbar or select a text style from the list before you add the text.
Always check the toolbar settings before adding text. Toolbar settings are remembered from the last selected text and will be applied to any new text if you do not change them first. |
For complete information about creating new features, see Create Features.
Related commands
• • • • • • | • • • • • |
Interface

The Text toolbar is used both to create text and to edit it.
If you create text, all settings in the toolbar are applied to the new text.
Always check the toolbar settings before adding text. Toolbar settings are remembered from the last selected text and will be applied to any new text if you do not change them first. |
If you edit existing text, some settings are applied to the entire text string and some only to selected characters.
Toolbar commands
• • • • • | • • • • |
Procedure: Non-cartographic text
1. Select a layer.
2. Set the text formatting using the Text toolbar.
3. Select the Create Text Feature command.
The mouse pointer changes ( ).
).
4. Click to position the first point.
5. [Optional] Click to position any other necessary points.
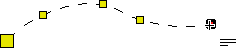
Note that after you click on the third point, the points form a curved line.
To remove points, press <Backspace>. You can remove all points in order until only the first two points remain. To remove all points, press <Esc>.
6. Type the text.
When you type the first character, a box is displayed around the text line.
The shows the text cursor and the text as you type it.
If the typed text is longer than the line, the line is expanded to fit the text, unless full justification is used, in which case the text is compressed to fit the line.
7. Finish text using one of the following methods.
• click outside the text box
• press <Enter>
• right-click and select End Text from the pop-up menu
The Attributes window for the tmpchg feature is displayed.
8. Define the mandatory attributes.
9. Define any other necessary attributes.
10. Press <Enter>
The text is added.
Procedure: Cartographic text
1. Select a layer.
2. Set the text formatting using the Text toolbar.
3. Select the Create Text Feature command.
The Select Object Acronym dialog box is displayed.
4. Select a text acronym and click OK.
The Attributes window is displayed.
5. Set any necessary attribute values.
The mouse pointer changes ().
6. Click to position the first point.
7. [Optional] Click to position any other necessary points.
Note that after you click on the third point, the points form a curved line.
To remove points, press <Backspace>. You can remove all points in order until only the first two points remain. To remove all points, press <Esc>.
8. Type the text.
When you type the first character, a box is displayed around the text line.
The shows the text cursor and the text as you type it.
If the typed text is longer than the line, the line is expanded to fit the text, unless full justification is used, in which case the text is compressed to fit the line.
9. Finish text using one of the following methods.
• click outside the text box
• press <Enter>
• right-click and select End Text from the pop-up menu
If any mandatory attributes were not defined, the Attributes dialog box is displayed.
10. Define the attributes and press <Enter>.
The text is added.
