![]()
The License Setup wizard provides an option to use a network license. This option allows a client machine to run a Teledyne Geospatial application using a network license shared on a license server. To do this, a license server must be set up and have a network license available.
To set up a license server you must first install the Teledyne Geospatial License Manager software. This installation adds the following items to the server computer:
• License Manager: an application used to manage license settings on the local computer.
• RMS License Manager service: a service that allows client computers to connect to the server.
• License Administration: an application used to monitor and manage the network license and the clients connected to it.
The Teledyne Geospatial License Manager software can be downloaded from the CARIS Software EMS license and downloads portal.
Once the installation has been completed, a license needs to be activated on the server machine.
To license a server machine:
1. Launch the License Manager application on the server computer.
![]()
2. Click the Configure licenses button in the top-right corner of the window to launch the License Setup wizard.
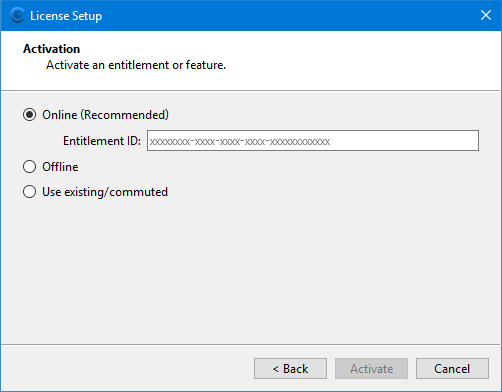
You will receive an entitlement certificate email. In this email is an Entitlement ID (EID) number that will be used to activate the license for your license server.
3. Copy the EID number from your entitlement certificate email.
4. Paste the EID number in the Entitlement ID field in the License Setup wizard.
5. Click Activate.
The Activate Products step is displayed.
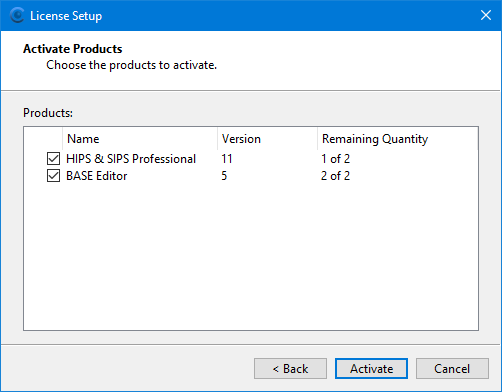
This step lists all product licenses that can be activated with the specified EID. Separate licenses are needed for each product, or in some cases, each module within a product. If a product has already been activated using the same EID, that product will not be available for selection.
6. Click the check box for each product you want to activate.
7. Click Activate.
The Activation Complete dialog box is displayed identifying the product licenses that were activated.
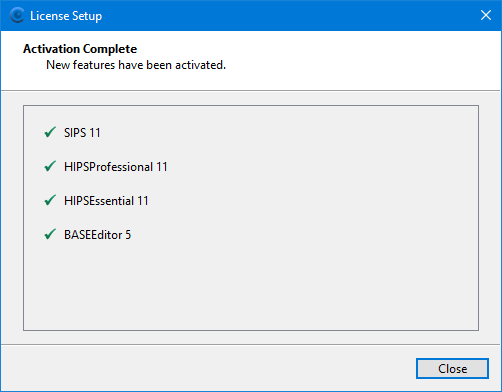
The license server is now available for clients to connect to the license.
8. Click Close to close the License Setup wizard.
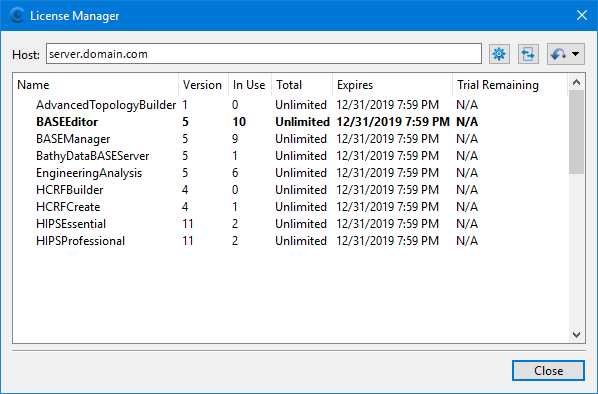
The activated license is now displayed in the License Manager.
The connections to the license can be monitored in the License Administration application, accessible from the Start menu under Teledyne Geospatial > License Administration.
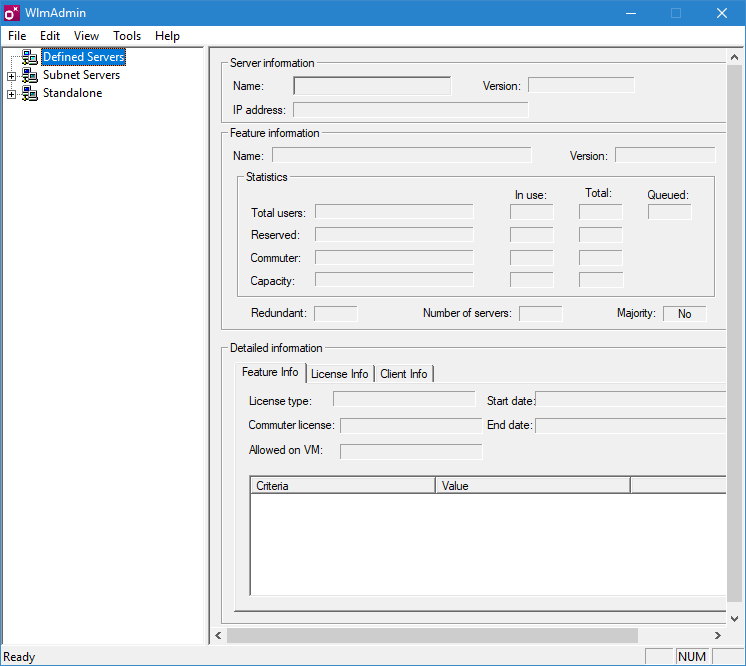
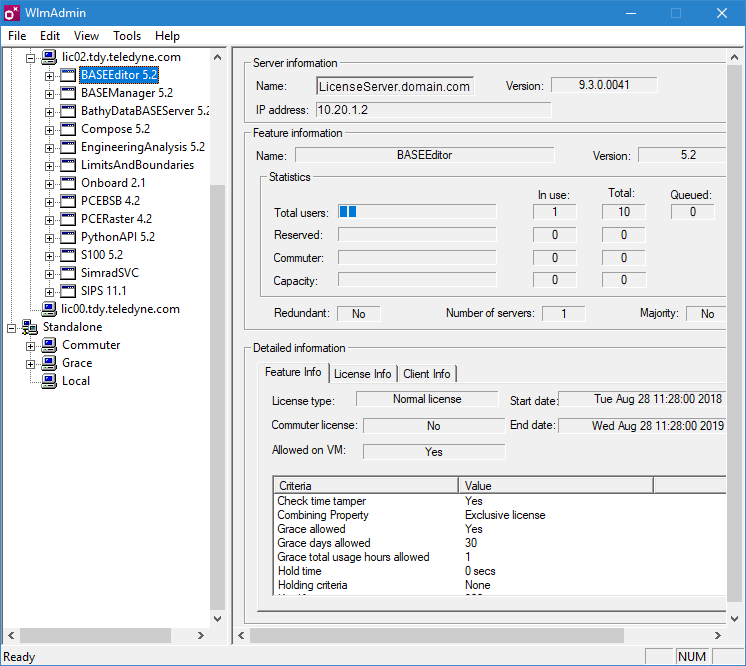
When License Administration is launched, the left side of the application displays a list of the servers that have been set up in the application. The Subnet Servers list identifies all computers on the network running the RMS service, including the current computer. You can expand the items in these lists to see what licenses have been added to the various computers.
Selecting one of these licenses displays details about the license in the right side of the application, including the number of seats available, the number of seats being used and the start and expiry dates for the license.
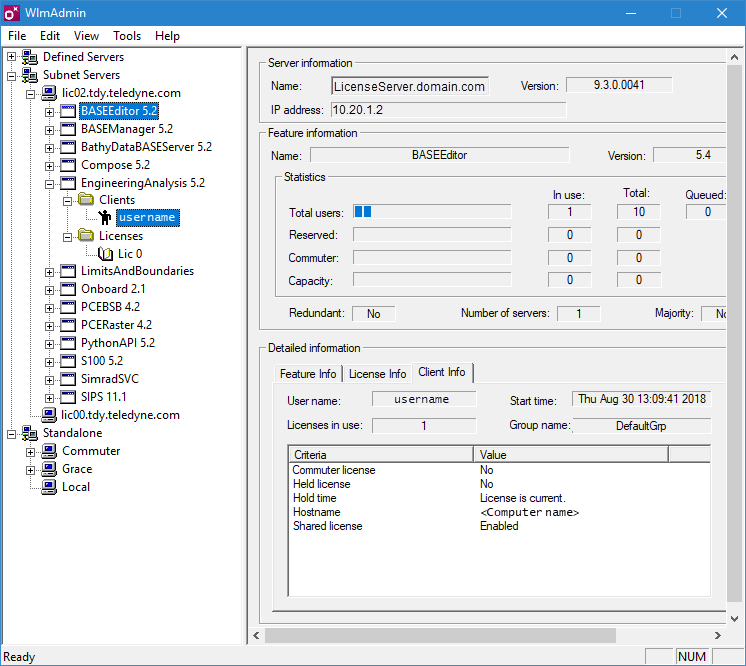
When a client machine is connected to the license server, the user account active on that machine will be displayed under the relevant license. Expand the server and its licenses to view details about connected users.
If additional licenses need to be added, right-click the relevant server in the list and select Add Feature > From a File > To Server and Its File. This will allow you to select the license file of another license.
If a license needs to be removed, right-click the relevant license in the server list and select Remove Feature.
If settings have been changed in the licenses, right-click the server or the license in the list and select Refresh to see the most recent settings.
For more information on the License Administration tool, please contact Customer Service. |