Menu | Tools > Custom Process |
Tool |
|
Menu | Tools > Custom Process |
Tool |
|
Create a custom process to be run in Python code as a process model. The new process definition is created in the form of a .py file and a .pyprocess file in JSON format. These files get stored in the custom process location and can be used to build a process model or run a process from either the Tools window of a Teledyne Geospatial application or CARIS Batch. The new process is accessible from the Tools list of available processes.
Once the Python process is created, code must be written manually in the .py file to allow the .pyprocess file to be run and perform the task for which the process was created. Open the resulting .py file in the preferred coding tool to add the necessary code; a small amount of code is generated automatically in the file to help get started. Refer to the CARIS API Documentation website for information on the API code.
A right-click context menu is available from custom processes in the Tools list. The following commands are available in the menu:
• Edit: This opens the Custom Process dialog box allowing edits to be made to the custom process definition. Editing the process will backup the original .pyprocess file and create a new one with the changes. The accompanying .py file is not updated, any changes made to the process definition must be implemented manually in the .py file.
• Open Code Location: This opens Windows File Explorer and navigates directly to the .py file for the Python process.
In order to run a custom process, Python needs to be available on the computer being used to run the process. This involves installing a supported version of Python, enabling a Python module and setting up the necessary environment variables on the computer. For information on how to setup Python, see Getting Started in Python.
Interface
The Custom Process command uses the following dialog box.
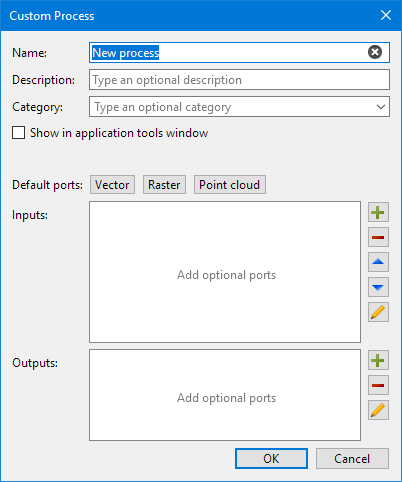
The options available in the dialog box are described in the table below.
Option | Description | |
|---|---|---|
Name | The name to assign to the new Python process. This is the name that will be displayed for the process in the Tools list of Teledyne Geospatial applications. | |
Description | A textual description of the process. This information will be displayed when hovering over the process in the Tools list of Teledyne Geospatial applications. | |
Category | A category in which to assign the new process. This determines where the new process will be located in the Tools list. An existing tool can be selected from the list or a custom category can be created by typing a name in the field. The new custom process will be added as a child of the selected/created category. | |
Show in application Tools window | Enable this option to include the new process in the list of tools available in the Tools window of the Teledyne Geospatial application from which Process Designer was launched. Note: If the custom process is not stored in the Custom Processes location specified in Tools > Options > Files and Folders for the application, the custom process will not be displayed in the Tools window even if this option is enabled. | |
Default ports | Automatically create ports for the process using defaults defined for each of the data formats, rather than defining the ports manually. Clicking the button for one of the formats will add ports in both the Inputs and Outputs lists. These ports can be adjusted or removed as needed once added to the lists. | |
Inputs | Manually define input ports for the process. If a Default ports option was used, some ports may already be present in the list. The following tools are available for defining input ports: | |
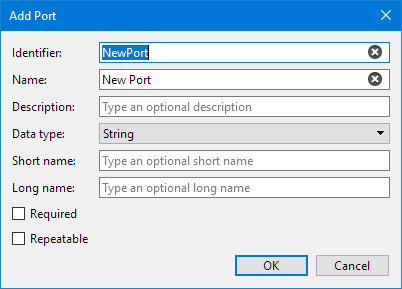
Add Port | Add an input port to the process. 1. Click the button to launch the Add Port dialog box, which is used to define settings for the new port.
The following settings are available for the port: • Identifier: The identifier that will be used for the port in the python code. • Name: The name that will be displayed for the port when the process is added to the Model View of Process Designer or when the process is populated in the Run Process Model dialog box of a Teledyne Geospatial application. • Description: A textual description of the function of the port. • Data type: The type of data that can be added to the port. • Short name: The short name of the port to be used if running the process in CARIS Batch. • Long name: The long name of the port to be used if running the process in CARIS Batch. • Required: Define whether the port is mandatory for running the process. • Repeatable: Define whether the port can have multiple items specified. When enabled, the property for the port will be in a list format. 2. Define the port settings as needed. 3. Click OK. The port is added to the list, displayed with the Name setting specified. | |
Remove Port | Remove the currently selected port from the process. | |
Move Selected Port | Move the currently selected port up or down in the list of input ports. | |
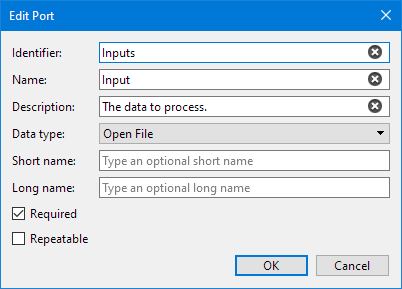
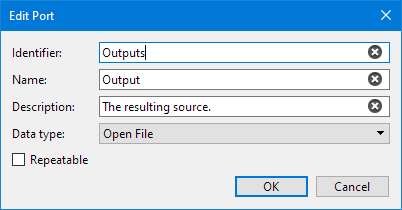
Edit Selected Port | Launch the Edit Port dialog box and change the settings for the currently selected port. The settings available will be the same as adding the port.
| |
Outputs | Manually define output ports for the process. If a Default ports option was used, some ports may already be present in the list. The following tools are available for defining output ports: | |
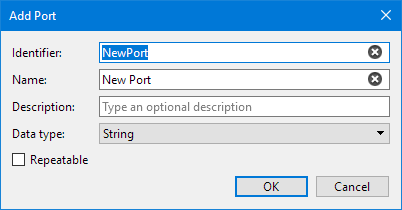
Add Port | Add an output port to the process. 1. Click the button to launch the Add Port dialog box, which is used to define settings for the new port.
The following settings are available for the port: • Identifier: The identifier that will be used for the port in the python code. • Name: The name that will be displayed for the port when the process is added to the Model View of Process Designer or when the process is populated in the Run Process Model dialog box of a Teledyne Geospatial application. • Description: A textual description of the function of the port. • Data type: The type of data that can be added to the port. • Repeatable: Define whether the port can have multiple items specified. When enabled, the property for the port will be in a list format. 2. Define the port settings as needed. 3. Click OK. The port is added to the list, displayed with the Name setting specified. | |
Remove Port | Remove the currently selected port from the process. | |
Edit Selected Port | Launch the Edit Port dialog box and change the settings for the currently selected port. The settings available will be the same as adding the port.
| |
Procedure
To create a custom process:
1. Click Add a Custom Process in the toolbar or select Custom Process from the Tools menu.
The Custom Process dialog box is displayed. If the Custom Processes option in Tools > Options > Files and Folders has not been defined in the Teledyne Geospatial application from which Process Designer was launched, a Save As dialog box will be displayed to select the storage location for the new process.
2. If necessary, select a location for the Python process files.
3. Specify a Name and Category for the process, along with the necessary Input and Output Ports.
4. Click OK.
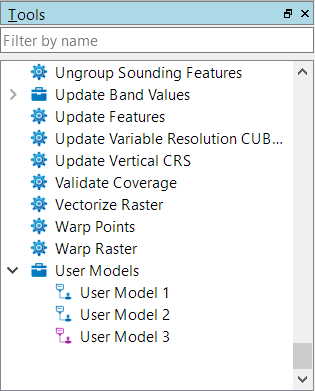
The new process is added to the Tools list under the specified category. Custom processes are displayed in the list using the Python process icon (![]() ) for easy identification. Windows Files Explorer is also opened, with the newly created .pyprocess file selected.
) for easy identification. Windows Files Explorer is also opened, with the newly created .pyprocess file selected.
5. Open the .py file in the preferred coding tool and write the necessary code to run the newly created process.
If the custom process is added to a process model in the Model View, the title bar of the tool will display with a purple colour, indicating that it is a custom Python process.
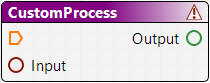
Also, when that model is saved, it will be added under the User Models category in the Tools list with the Python process icon rather than the standard User Model icon (![]() ).
).