A number of modifications can be performed on a template after it has been created.
Most modifications are preformed in the Spatial tab of the Model Feature window. One exception is the name of the template, which can be changed in the Identification tab.
In the Spatial tab, you can:
• Add or remove the surfaces that make up the template
• Adjust the settings of the surfaces in the template
• Fill holes in the template
Related commands:
• New Template from Existing Surfaces
• New Template from a Cross-Section
Procedure: Add/Remove Surfaces
You can add to or remove the surfaces that make up the template.
1. Select the template you want to modify in the Model window, or superselect the template in the Display window.
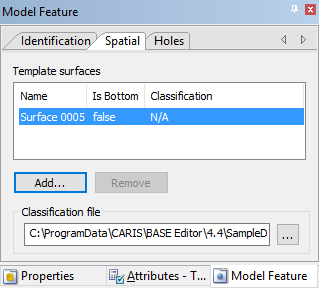
2. Select the Spatial tab in the Model Feature window.
3. Click Add to launch the Add Surface dialog box.
4. Select a surface to add to the template and click OK.
5. To remove a surface from the template, select a surface in the Name list and click Remove.
Procedure: Adjust Surface Settings
To adjust the settings of the surfaces in the template:
1. Select the template you want to modify in the Model window, or superselect the template in the Display window.
2. In the Model Feature window, select the Spatial tab.
3. Select a surface from the Name list.
4. If the selected surface is located at the bottom of the model, set the Is Bottom value to True (the default value is False).
5. Select a Classification option to assign to the surface; the default value is NA.
The Classification values available are controlled by the classification file selected for the reference model. If the values available do not meet your needs, a different classification file can be selected.
6. Click the Classification file browse button (...) to change the classification file being used.
Procedure: Fill Holes
Templates with holes in them are evaluated as incomplete. For a hole cut in a surface template using another surface you must fill these holes by using the cut-out surface (for more information, see Add or Edit Surface Holes).
1. Select the incomplete template in the Model window or superselect it in the Display window.
2. Select the Spatial tab in the Model Feature window.
3. Click Add.
4. Select the cut-out surface.
5. Click OK.
The template hole is filled.
6. [Optional] For each hole to fill in the selected template, repeat steps 4 through 6.