Menu | File > New > Subset Tiles |
The New Subset Tiles command can be used to create tiled vector featuress which can be used to perform systematic analysis of data in Subset Editor.
Each subset tile has a set of attribute values indicating when it was created and by whom, and when it was modified and by whom. They also have the Analysis status attribute, which is specifically intended to help with analysis by indicating whether the points within a tile have been analyzed in Subset Editor or not. The possible values for this attribute include:
• None: the default value, indicating the points have not been analyzed.
• Partial: indicating that the analysis of the points within the tile is partially complete.
• Done: indicating that the analysis of the points within the tile is complete.
Having this attribute allows a user to perform analysis on a point cloud in multiple stages without losing track of which data has already been analyzed. The status can be set either within Subset Editor during analysis or in the Attributes window when the subset tiles layer is in Edit Mode.
Because tiles are created as vector features, each tile can be edited or deleted as needed. In order to edit either the geometry or the attributes of a tile, it must first be in Edit Mode. The Undo/Redo commands are also supported when working with subset tiles.
Related commands:
• Delete Selection/Superselection
Interface
The New Subset Tiles command uses the following dialog box.
Option | Description |
|---|---|
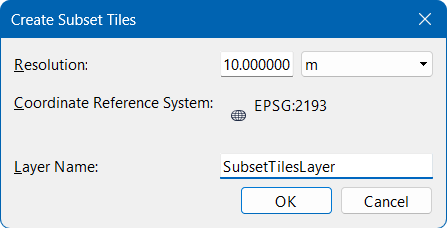
Resolution | The resolution used to create the subset tiles. 1. Specify the resolution value. 2. Select a unit of measure for the resolution. |
Coordinate Reference System | The coordinate reference system (CRS) that will be used to created the subset tiles. By default, tiles are created in the CRS of the view but can be rotated to align with the direction of a survey. Multiple sets of tiles can be created in different areas if the alignment changes. |
Layer Name | The name of the layer that will be created to store the subset tiles. A new layer is created each time that subset tiles are created. This is a temporary layer that must be saved if the subset tiles are to be retained. If multiple layers are created for multiple sets of tiles, the layers can be grouped to simplify working with the multiple layers. See Group / New Group for more information. 1. Type a name for the subset tiles layer. |
Procedure: Creating Subset Tiles
1. Open the point cloud(s) for which subset tiles will be created.
2. Select the New Subset Tiles command.
The Create Subset Tiles dialog box is displayed.
3. Specify a resolution value and unit of measure if different than that selected.
4. Enter a name for the feature layer in which the subset tiles will be created.
5. Click OK.
The dialog box is closed and the cursor changes to digitize a grid of subset tiles.
6. Press and hold the left mouse button and drag the cursor until the grid contains enough tiles to cover the desired area, then release the mouse button.
The grid can be moved, resized or rotated if needed using the following methods:
Move | 1. Place the mouse cursor inside the grid. Note the change in the cursor shape 2. Press and hold the left mouse button, then move the cursor to drag the grid to the desired location. 3. Release the mouse button. |
Resize | 1. Place the mouse cursor over the grey circle in either the top-left or bottom-right corner of the grid. Note the change in the cursor shape 2. Press and hold the left mouse button, then drag the cursor to change the grid to the desired size. 3. Release the mouse button. |
Rotate | 1. Press and hold the <Ctrl> key. 2. Place the mouse cursor over the grey circle in either the top-left or bottom-right corner of the grid. Note the change in the cursor shape 3. Press and hold the left mouse button, then drag the cursor to rotate the grid to the desired angle. 4. Release both the <Ctrl> key and the mouse button. |
7. When the grid is satisfactory, press <Enter> to create the subset tiles and add the new layer to the Layers window, also populating the Created by user and Creation time attributes of the new tiles.
8. [Optional] Save the layer for future use.
This process can be repeated for each area that subset tiles are required. If multiple sets of tiles are created, the resulting layers can be grouped to simply interactions with the layers.
Procedure: Using Subset Tiles in Subset Editor
Once subset tiles have been created, they can be used to identify areas in a point cloud that have been analyzed in Subset Editor. This is done by marking a tile as Done or Partially Done, indicating that the points in the area of the tile have or have not been analyzed, which is.
1. Open a point cloud.
2. Create or open a layer of subset tiles for the point cloud.
3. Launch Subset Editor.
4. Load a subset for the area covered by one or more tiles. If the subset tile layer is set as the Snap/Grab Target layer, the subset can be snapped to the boundary of a tile by pressing <Shift> and clicking the tile.
5. Perform the needed analysis on the points within the subset.
6. Using either the menu commands or the toolbar buttons, mark the tile as Done or Partial, depending on whether the analysis of the area is complete or not.
| Tools > Editors > Subset > Partial |
| Tools > Editors > Subset > Done |
This updates the Analysis status attribute value of any tiles completely within the subset area and changes the colour of the tile(s) according to the value selected. Changing this value will also update the Modified by user and Modified time attribute values of the tile(s), but only when changed from within Subset Editor; changing the Analysis status attribute in the Attributes window will not update the Modified attribute values.
The Undo and Redo functions can be used to reverse this change while in Subset Editor if needed. |
7. Save the changes to the subset tile layer(s).
 .
. .
. .
.
