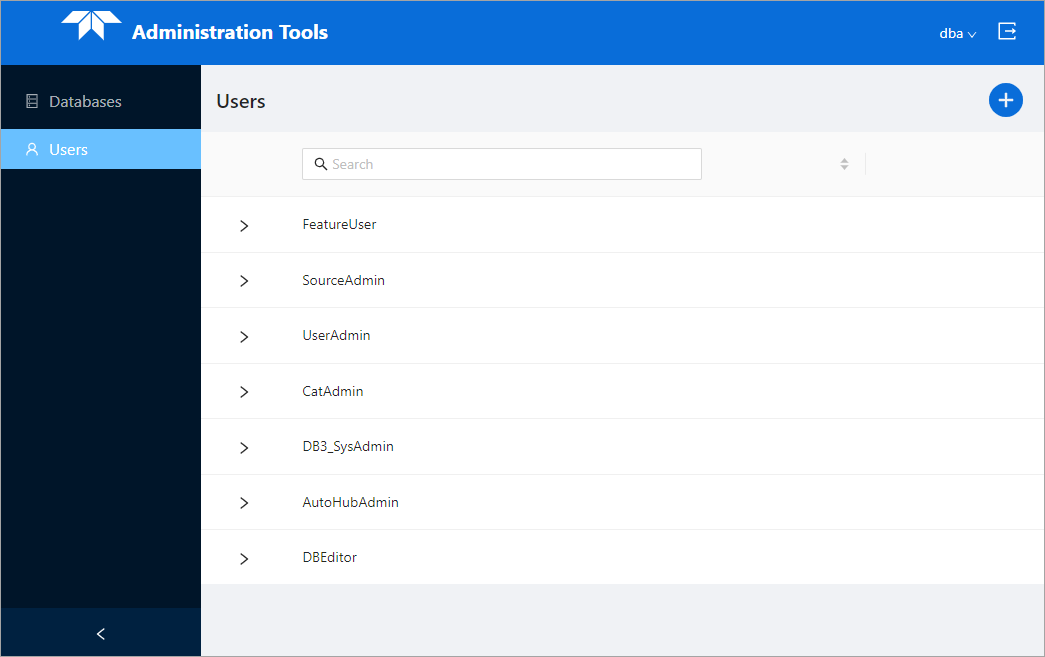
The Users page is used to manage user accounts in BDB Server. The page contains a list of existing user accounts and provides tools for creating or editing accounts.
In order to access the Administration tools or connect to a database via the BASE Manager module, the user must have a user account.
By default, the list of users on the Users page is sorted according to the date they were created or edited. The arrow buttons at the top of the list can be used to sort the list in ascending or descending order if desired. Clicking the arrows a third time will cancel the sorting and reorder the list according to the modified date.
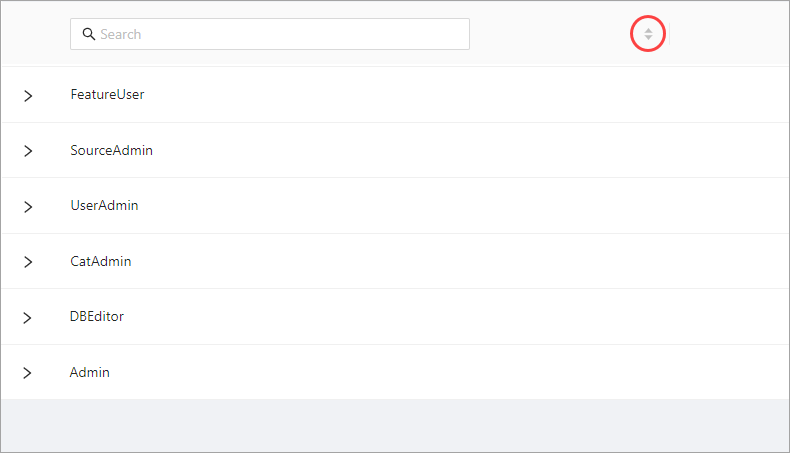
The list can also be filtered using the Search field above the list. This is a text-based search that filters the list automatically as text is entered in the field. The X button ![]() at the end of the field can be used to clear the filter.
at the end of the field can be used to clear the filter.
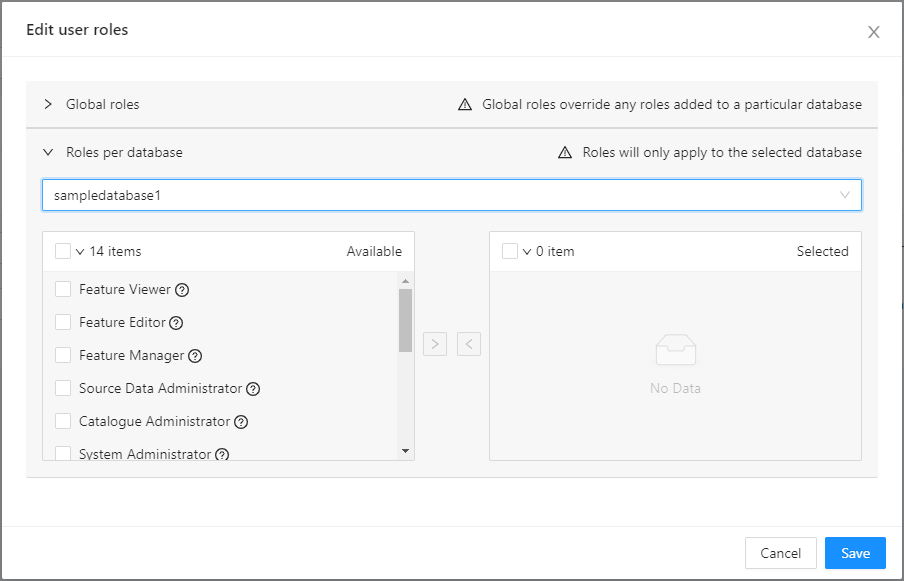
Each user account is assigned roles that determine what functions they can perform in CARIS applications, including both read-only access and editing through the BASE Manager module in BASE Editor. Roles can be assigned on a global basis or per database. Global roles provide the same level of access to all databases in the server instance. Database roles only apply to the individual databases for which the role was given. If a user has both global and database roles, the global roles will override the database roles.
The available user roles include:
User Role | Permissions |
|---|---|
Feature Viewer | View database features and attributes. |
Feature Editor | Edit database features and attributes. This role also includes the Feature Viewer permissions. |
Feature Manager | Create and delete database features. This role also includes the Feature Editor permissions. |
Source Data Administrator | Manager coverage data on database features (e.g., adding, updating and removing coverage data) and run server processes (e.g., Server Combine to Raster). This role also includes the Feature Manager permissions. |
Catalogue Administrator | Manage the database catalogue. This role also includes the Feature Viewer permissions. |
System Administrator | This role provides all of the permissions available with the Feature Manager, Source Data Administrator and Catalogue Administrator roles. |
Database Viewer | View the list of databases on the Databases page in Administration Tools. |
Database Editor | Edit the databases in the Databases page in Administration Tools. This role also includes the Database Viewer permissions. |
Database Manager | Create and delete databases in Administration Tools. This role also includes the Database Editor permissions. |
User Viewer | View the list of BDB users on the Users page in Administration Tools. |
User Editor | Edit BDB user accounts in the Users page in Administration Tools. This role also includes the User Viewer permissions. |
User Manager | Create and delete BDB users in Administration Tools. This role also includes the User Editor permissions. |
Automation Hub Manager | Create and delete Automation Hub scripts and actions. |
Automation Hub Executor | Execute Automation Hub actions. |
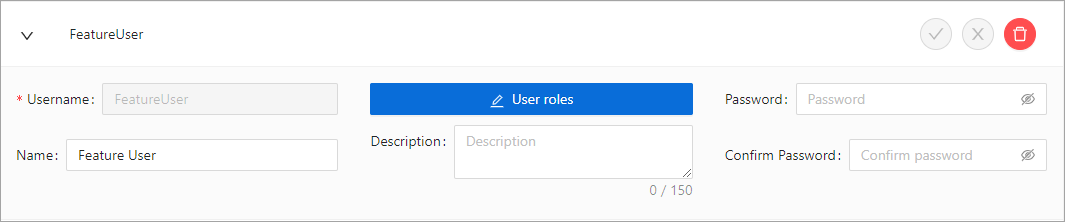
The details of a user account can be viewed by clicking the arrow beside the user name to expand the panel. To view the roles assigned to the user, click the User Roles button.
Add a New User
Users with the User Manager role can create new BDB users.
To add a new BDB user:
1. Click the Add new button.
A new entry is added to the users list with the settings fields all empty. The following settings are available when creating a new user:
Setting | Description |
|---|---|
Username | The identifier for the user account that is used to log into the application and is recorded in the metadata of database features and coverages. This can be any textual string, but should be something that is easy to remember and identify. |
Name | The first and last name of the user for which the account is being created. |
User Roles | The user roles to assign to the account. 1. Click the User Roles button to launch the Edit User Roles dialog box 2. Expand either the Global roles panel or the Roles per database panel. 3. For database roles, select the relevant database from the drop-down list. 4. Click the check box beside the relevant role(s) in the Available list. 5. Click the arrow button pointing to the right to move the role(s) into the Selected list. The check boxes at the top of each list can be used to select all roles in the current list. 6. Click Save. |
Description | A brief textual description of the user account, up to a maximum of 150 characters. |
Password | The password to use when logging into the application with the user account. The Show/Hide button |
Confirm Password | Enter the password a second time to ensure the password was entered correctly. The Show/Hide button |
2. Enter all necessary information for the user account.
3. Click Save  .
.
Edit a User Account
Users with the User Editor and User Manager roles can edit the settings of an existing user account if needed.
To edit a user account:
1. Expand the panel for the relevant user account.
2. Edit the settings as needed.
3. Click Save .
If the changes are not wanted, the Discard button  can be used to undo the changes. If changes are made but not saved, a message will be displayed prompting to save the changes when the Discard button is clicked or when the user panel is collapsed.
4. Click Continue working if further changes are needed, click Discard to undo the changes or click Save to apply the changes.
Delete a User Account
If a user account is no longer needed, it can be deleted using the Delete button  in the expandable user panel or the Delete button
  displayed when hovering the mouse cursor over a user account in the list. This is a permanent removal of the user; once the account is deleted it cannot be recovered.
The User Manager role is required to delete a user account. |
To delete a user:
1. Select the relevant user in the list.
2. Click the Delete button.
A message is displayed to confirm the deletion of the user.
3. Click Yes to complete the deletion.
 at the end of the field can be used to make the text visible or hidden.
  at the end of the field can be used to make the text visible or hidden.