In step 1: General of the Combine Coverages wizard, you must define the input coverages and the output location.
Interface
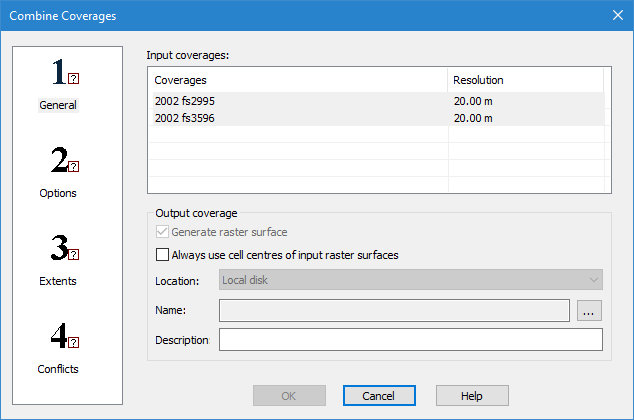
The following is the first step of the Combine Coverages wizard.
Option | Description |
|---|---|
Input coverages | The coverages to be included as input for the combined coverage. By default, all open coverages in a supported format are selected as input. 1. Press and hold the <Ctrl> key and click the coverages to be combined. |
Generate raster surface | Generate the output coverage as a raster surface when a point cloud is selected as an input coverage. This option is disabled if raster surfaces are selected as the input coverages. |
Always use cell centres of input raster surfaces | Use cell centre positions of nodes in the generation of the output coverage when generating a raster surface. If left unchecked, true positions will be used. If the contributor surfaces do not contain at least one raster surface, this field will be disabled. |
Location | The location for the output coverage when combining database coverages. By default, the resulting coverage is added to the database of the source data, but can be saved to the local machine, if desired. If outputing to the database, you must select the type of feature object to be created. The available types are populated based on the database of the catalogue; all feature types in the catalogue are available in the drop-down list. The newly created coverage will be accessible from any database filter layer on which the new coverage meets the filter criteria. This option is only enabled if combining database coverages that have not been opened locally. 1. Select an option from the drop-down list. Because bathymetry is added to the database, and this cannot be undone via the Undo command, the application will not allow this command to be run if there are any previous unsaved changes. If there are unsaved changes, a message will be displayed prompting you to save your changes before continuing. |
Name | The name to assign to the output coverage. If saving to the local computer, this field is also used to select the location for the output. 1. For a database coverage, enter a name in the text entry field; for a local coverage, click the browse button (...) then define a name and location for the output coverage. |
Description | A brief textual description of the output coverage. |
Procedure
1. Open the surfaces that you wish to combine.
2. [Optional] If combining database coverages, select the database filter layer and then select the relevant feature objects.
3. Select the Combine command.
The Combine Coverages dialog box is displayed.
4. Select the coverages to be combined.
5. Define the output Location and Name.
6. Define any other necessary options.
7. Select step 2: Options on the left and continue to Combine Coverages: Step 2 Options.