Tool | Properties window > Style |
The Style property is used to define display portrayals for data based on user-specified classifications. A different style can be applied to each layer to easily identify data according to its classification. A style consists of rule groups that essentially filter the data in the Display window based on attribute values. Each rule group is defined in either the Classification dialog box or the Filter dialog box and then applied to the data. A set of rules is automatically generated from the specified criteria and the values in the source data. Multiple rules can be defined and ordered for a single style definition.
The Style functionality can be used with data in several vector formats, such Shapefiles, GML, GeoPackage, AutoCAD and CARIS DES. It also works with database object layers. It is not currently compatible with HOB and S-57 ENC data.
Related commands:
• Filter
Interface
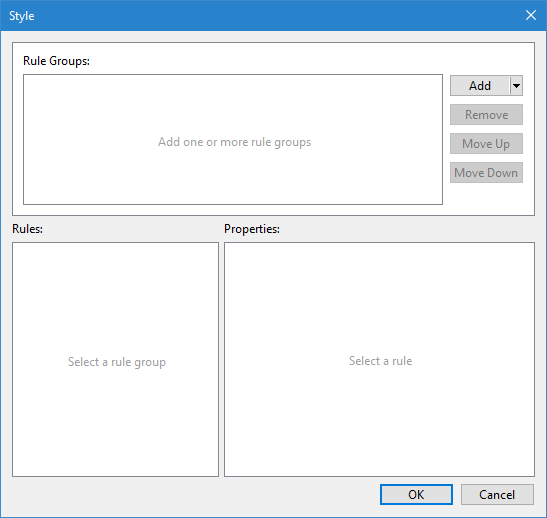
The Style command uses the following dialog box.
Option | Description |
|---|---|
Rule Groups | The rule groups that have been generated for each set of classification or filter rules. Each time a new rule is added using this tool, a new rule group is added to the list. When a rule is selected, the Move Up and Move Down buttons can be used to change order of the rule in the list. The rules are applied to the data in the order that they appear in the list. If a conflict occurs between the rules, the top-most rule will supercede the other rules. |
Add | Add a new rule group to the style. A rule can be created from a classification that is specific to the format of the data in the layer for which the style is being created; or from a filter expression that is not limited to the data in the source layer. 1. Click the Add button to expand the drop-down list. 2. Select the type of rule to define. 3. Define the rule in either the Classification dialog box or the Filter dialog box. See Classification and Filter for more information on each tool. |
Remove | Remove the currently selected rule group from the style. 1. Select a rule group in the list. 2. Click the Remove button. |
Move up/Move Down | Move the currently selected rule group to a different location in the list. 1. Select a rule group in the list. 2. Click either the Move Up or Move Down button. |
Rules | The rules that have been automatically generated for the currently selected rule group. This list can differ depending on the input data even if the same rule has been applied. |
Properties | The portrayal settings for the rule currently selected in the Rules list. If the automatically generated rule is not sufficient, the Filter property can be used to adjust the rule. |
Apply | Apply the current style settings to the display without closing the dialog box. This allows you to determine if the selected settings provide the desired display, or if the style settings need to be adjusted. |
OK | Apply the current style settings and close the dialog box. |
Procedure
1. Select a layer in the Layers window.
2. Select the Style property in the Properties window.
3. Click the browse button (...) to launch the Style dialog box.
The Style dialog box is displayed.
4. Click Add and select the desired rule creation tool.
5. Define the rule criteria and click OK.
6. Define any necessary portrayal settings for the resulting rules.
7. If necessary, define additional rule groups.
8. Click Apply to preview the display with the selected settings.
9. Click OK to close the dialog box.
The rules defined for the style are applied to the display of the data.