Selected features are highlighted in the Display window, and information about those features is displayed in a grid in the Selection window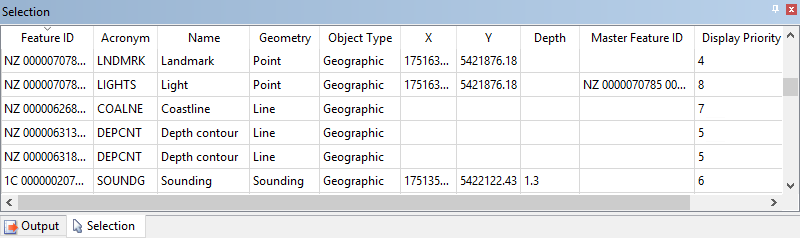
A selection is a feature or group of features chosen with the mouse or with a command.
One feature in any selection is superselected. The superselected feature has focus. Any operation that is performed on a single feature rather than the group is performed on the superselection.
Selected features are highlighted in the Display window, and information about those features is displayed in a grid in the Selection window
The superselected feature is highlighted.
To superselect a different feature, click on the appropriate row.
Column settings
You can customize the way selection information is displayed in the Selection window.
1. 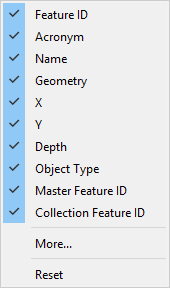 Right-click on one of the attribute columns.
A pop-up menu is displayed. This contains commands for customizing the columns.
2. To show or hide columns, click the column name.
A column is visible if it has a check mark beside it. It is hidden if there is no check mark.
3. To restore the columns to their default settings, select Reset.
4. To customize the columns, select More.
The Choose Columns dialog box is displayed.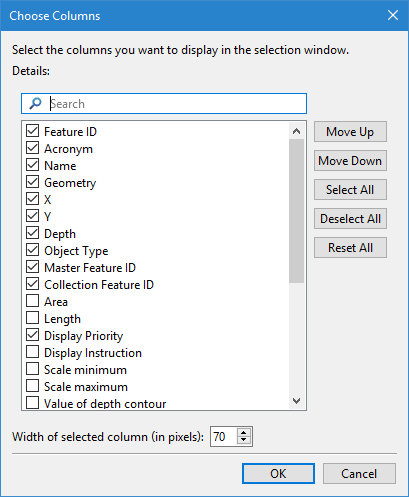
All available columns are listed. Those with a populated check box are included in the Selection window. The selected columns are displayed in the Selection window according to their order in this list.
1. To add or remove a column from the window, click the check box to either populate or clear the check box.
2. To select all columns for display, click the Select All button.
3. To deselect all columns and remove them from the display, click the Deselect All button.
4. To change the position of a column in the list, select the relevant column name and click either the Move Up or Move Down button to move the selected column to a new location.
The column order can also be changed in the Selection window by clicking and dragging each column to the desired location. |
You can also set the width of each individual column:
5. Select the column name in the list.
6. In the Width of selected column (in pixels) field, either type a width value or use the Up and Down Arrow buttons to select a width value.
7. To confirm your changes, click OK.
The column layout in the Selection window is changed.
Using the selection
A second pop-up menu lets you manipulate the selection and modify the display based on the selection:
1. 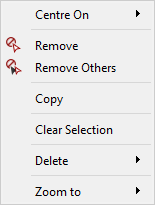 Right-click anywhere within the Selection window except the column headings.
From this pop-up menu, you can:
• Centre on: Centre the display on the superselection or on the selection.
• Remove: Remove the highlighted rows from the selection. This does not remove the feature from the Display window.
• Remove Others: Remove all features except the highlight features from the selection.
• Copy: Copy all values from the selected row to the Windows clipboard. This information can then be pasted in any text editor.
• Clear Selection: Remove all features from the selection.
• Delete: Permanently delete the superselection or selection. This command is only enabled if the Feature Editing module is installed.
• Zoom to: Zoom and centre the display on the superselection or on the selection.