A panel provides geo-referencing for raster layers. A chart may already have a panel when the raster layers are opened, otherwise a panel can be created after layers have been added.
Two conditions must be met before creating a panel:
• a chart must be created
• a raster set must be open before adding a panel.
1. Select the Sheet layer in the Layers window.
2. Select the New Panel command.
The Chart Panel Attributes dialog box is displayed.
3. Enter values for the panel attributes and click OK.
The application is now in digitizing mode.
4. Enter the extents for the panel using either of two methods:
• If you have an external file (e.g. a CARIS or HOB file) that is identical to the Raster Set, you can use that file to set the extent using digitizing tools.
• If the workspace is empty, type coordinates for the panel extent in the Coordinates window.
Panel data must now be added to the panel.
5. Select the Create Panel Data from Source command.
The panel is created and listed in the Layers window.
A border can assist with aligning the panel to the Raster Set layers if the raster layers already contain a border.
A border style can be set in Template Editor. For more information, see Template Editor.
6. [Optional] Select the Create Border command.
A border is added to the panel.
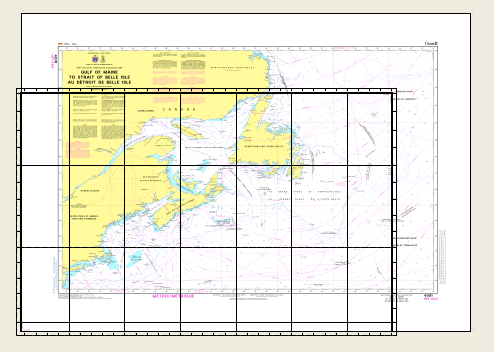
An example of the Display window with a panel and raster layers is shown below. The panel might not be aligned with the raster layer
The panel must be aligned with the raster layers.
7. Select the Move Panel command.
The panel is now highlighted, showing that it is in edit mode.
8. Use the mouse to drag the edges of the panel to the edges of the raster layers.
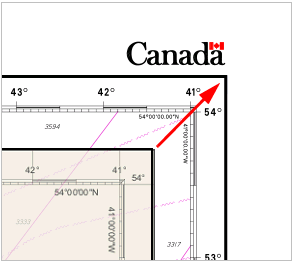
9. When finished, right-click and select Move > End from the pop-up menu.
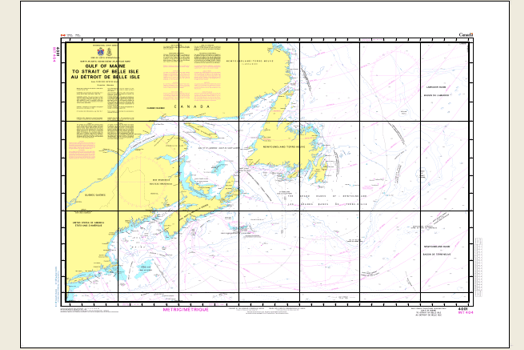
The panel and raster layers are aligned.
10. Save your changes.
Related commands:
• • • | • • |