Menu | File > Open > Connection |
Tool |
|
Pop-up | Add > Connection (Project window) |
Menu | File > Open > Connection |
Tool |
|
Pop-up | Add > Connection (Project window) |
The Open Connection command provides a single tool with two functions:
• create and save connections to specific data sources
• connect to a data source through a predefined connection
Predefined connections can be created to connect directly to a data source on any of the following types:
• Bathy DataBASE database
• Oracle Spatial (entire schema or single table) database
• PostgreSQL/PostGIS database
• Spatial FusionTM (ODBC or Oracle Spatial) database
• Web Map Service (WMS)
• Web Feature Service (WFS)
The Bathy DataBASE option is only available if the BASE Manager module is enabled. |
Connections are created by defining both the settings used to connect to the data source and the display properties that will be applied to the view when the connection is used. Each connection is saved to a Temp folder for the current Windows user account. This allows a connection to be made to the data source at any time without having to re-enter the settings and properties for each session. The location for these files can be changed using the Connections option under the Files and Folders category in Tools > Options.
Related commands:
Interface
The Open Connection command uses the following dialog box.
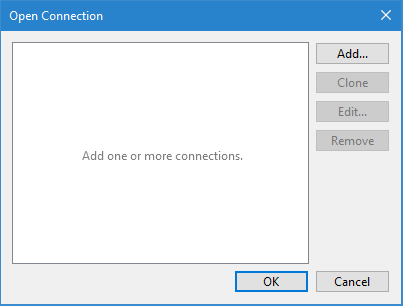
Option | Description |
connection list | A list of all connections that have been created. 1. Click on a connection in the list to select it. 2. Click OK to connect to the data source defined for the selected connection. Connections can be renamed if necessary. Double-click the name in the list, type a new name and then press Enter. |
Add | Launch the wizard used to create a new data source connection. See Add Connection for details on creating a new connection. |
Clone | Create a copy of an existing data source connection. This is useful if you need to connect to multiple databases on the same server using the same connection settings. The Edit button can be used to edit the settings of the cloned connection, such as the database selected for the connection. 1. Select a connection in the list. 2. Click Clone. A new entry is added to the list of connections. 3. Type a new name for the connection. 4. Select the cloned connection. 5. Click Edit. 6. Make any necessary changes to the connection. |
Edit | Edit the settings of an existing data source connection. Clicking this button launches the same wizard as the Add button, but prepopulated with the settings defined for the active connection. 1. Select a connection in the list. 2. Click Edit. 3. Make any necessary changes to the connection. |
Remove | Delete the selected connection and all of its settings. Once a connection is deleted, the only way to get it back is to recreate it. |
Procedure
1. Select the Open Connection command.
2. Click Add to launch the wizard to create a connection.
3. Define all necessary settings for the connection and click Finish.
The wizard is closed and you are returned to the original Open Connection dialog box.
4. Type a name for the new connection and press Enter.
5. Click OK to connect to the database.
