Menu | Tools > Bands > Compute Band |
Create a new band for an existing surface. The new band can be created from one or more existing bands, numerical operators and numeric values in an equation. You cannot create a band for a data source that is not present in the surface.
An expression can be applied to source data to alter the values in the new band. This is useful if you need to apply a shift, but do not want to apply it to all attributes in a coverage.
The expression can be built using the operator buttons in the dialog box as well as operators that can be entered manually. The operators supported in the command are listed below. Those that do not have buttons in the dialog box must be entered using the keyboard.
Operator | Type | Function | Example |
( ) | Grouping | bracketed operation | (Depth+1) |
+ | Mathematical | addition | Depth + 4 |
X | Mathematical | multiplication | Depth * 4 |
– | Mathematical | subtraction | Depth - 4 |
/ | Mathematical | division | Depth / 4 |
^ | Mathematical | exponentiation (Depthx) | Depth ^ 4 |
< | Mathematical | less than | Depth < 4 |
> | Mathematical | greater than | Depth > 4 |
= | Mathematical | equal to | Depth = 4 |
!= | Mathematical | not equal to | Depth != 4 |
AND | Logical | conditional relation | Depth > 4 AND Uncertainty < 0.5 |
OR | Logical | conditional relation | Depth > 4 OR Density > 5 |
Multiple expressions can be combined to build conditional expressions in the form below, where each part (in bold letters) can be a full expression in itself:
If Expression then ResultA else ResultB
Conditional expressions provide the added ability to have no‑data values in the results. When no‑data values are assigned to nodes in the output, those nodes will not be displayed and cannot be selected or exported.
Conditional expressions also allow mathematical expressions in the results. This allows the attribute values to be altered differently for each result or additional expressions to be run based on the results of the first expression. Examples of both are shown below:
If expression Then (Density+12) Else (Depth+10)
If (Density<2) Then 1 Else (if (Density<10) Then 2 Else (if (Density<20) Then 3 Else NO_DATA))
If using the AND operator, both relations must be true for the complex expression to be true. If using the OR operator, only one of the relations must be true for the expression to be true.
To correctly enter a conditional expression, the following rules must be followed:
• Always use if then else when defining conditions
• When a part of the expression (Expression, ResultA, ResultB) contains multiple parts, each part of the expression must be surrounded by brackets.
• The correct case must be used when specifying names of 'Available attributes', for example Deep and Density.
• Always use NO_DATA to set no-data values for a node.
Two examples of conditional expressions are provided below.
Scenario | Expression | Result |
Checking the depth and uncertainty values of all data on a surface. | If (Depth > 10 AND Uncertainty < 0.2) Then Depth Else NO_DATA | Each node that is deeper than 10 and has uncertainty less than 0.2 is added to the new layer using a value from the input Depth layer. All nodes that do not meet the criteria will be added to the new layer with the NO_DATA value. |
Testing a variable resolution surface against IHO Order 1a. | If (Density >= 5 AND ((Depth<=40 AND Resolution<=1) OR (Depth>=40 AND Resolution <= (0.1 * Depth)))) Then NO_DATA Else 1 | Each node that meets the criteria is added to the new layer with the NO_DATA value. All nodes that do not meet the criteria will be added to the new layer with a value of 1. |
Interface
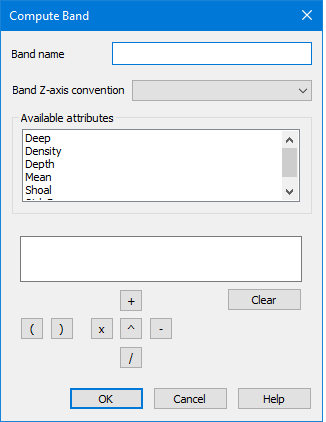
The Compute Layer command uses the following dialog box.
The fields in this dialog box include:
Option | Description |
Layer Name | The name to assign to the new layer. |
Layer Z-axis Convention | The Z-axis convention for the data in the new layer. The options include: • Depth with Z-axis positive down: to be used if the data in the new layer will contain depth values that are positive down. • Height with Z-axis positive up: to be used if the data in the new layer will contain elevation values that are positive up. • Not applicable. Generic numbers: to be used if the data in the new layer will represent generic, non-Z values (for example, Std_Dev). These values display as spikes and dips in the data. |
Available Attributes | All attributes available in the selected surface. These attributes are used as the source data for creating the new layer. |
Expression field | Define the expression to use to create new values in the new layer. 1. Double-click an attribute in the Available attributes list to add it to the expression field. If the selected attribute has a space in its name, you must place quotation marks around the attribute in the expression field (for example, “attribute name”). 2. Click the operator buttons (+, -, x, \, ^ or brackets) or manually type operators to add them to the expression field with the attribute name. 3. Type any necessary values for the expression operators. The Clear button can be used to delete the expression and start over. |
Procedure
1. Select the Compute Layer command.
2. In the Compute Layer dialog box, type a Name for the new layer.
3. Select the Z-axis convention for the layer.
4. Double-click the attribute to use as the data source for the new layer.
5. Define an expression.
6. Click OK.
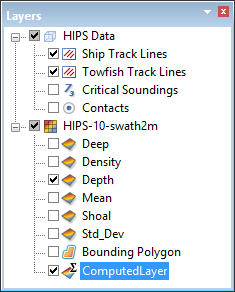
A new layer is added to the Layers window, populated with values from the source attribute that have been altered according to the user-specified expression.