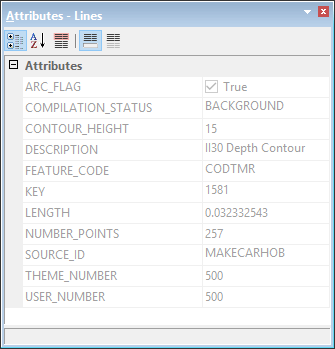
The Attributes window is used to view and edit attribute information for the superselected feature. By default, the values in this window are read-only. To edit the attribute values of a feature, Edit mode must be enabled by selecting the Edit Mode command. See Edit Mode for information on this command.
Set Attributes
There are several ways to set attributes. Below are examples of some of the types of properties that may be encountered. The control for a particular type of property, such as a date property, can differ based on the format of the data being viewed and the catalogue used to display the data, if a catalogue is used.
Type of Property Value | Procedure |
All | To set the value to Undefined, or an equivalent definition specific to the file format: 1. Right-click and select Undefined from the pop-up menu. |
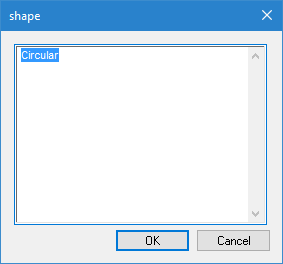
Text data | 1. Select the attribute. 2. Click in the value box. 3. Type the required text. If the text is too long to fit in the text box, you can do the following: 1. Click browse ( A text editor dialog box is displayed.
The name of the dialog box will change based on the attribute. 2. Type the text and click OK. You are returned to the Attributes window or dialog box. |
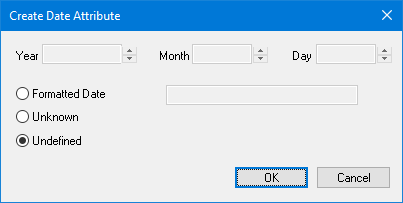
Date attribute | 1. Select the attribute. 2. Click browse ( The Create Date box is displayed.
3. Select one of the following options: • Formatted Date: Define the actual date. Change the Year, Month, and Day options using the arrow buttons. The formatted date is displayed in the box. • Unknown: The date is unknown. • Undefined: The date is not defined. 4. Click OK. 5. You are returned to the Attributes window or dialog box. |
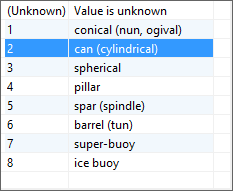
A list of values. Used for attributes that require a single value from a list of possible values. | 1. Select the attribute. 2. Click the down arrow ( A list is displayed.
3. Select the value from the list. |
A list of values. Used for attributes that can have multiple values from a list of possible values. | Possible values are listed on the left. Selected values are listed on the right. 1. Select the attribute. 2. Click browse ( A list is displayed.
3. Select a value from the left list. 4. Click the right-arrow button. The value is moved to the right list. To remove a value from the right list: 1. Select the value. 2. Click the right-arrow button. To reorder the selected values: 1. Select a value. 2. Click the up and down arrows to move the value. Click Clear to clear the list. Click OK to return to the Attributes window or dialog box. |
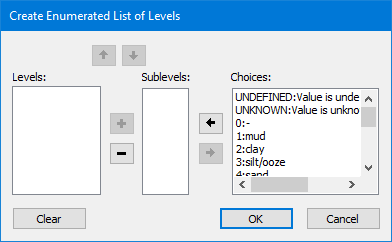
Enumerated attributes where the values can be ranked in order. Examples are the NATSUR and NATQUA attributes. Attribute values can be on an equal level or in a hierarchy. • Values on an equal level are separated by a comma. A surface that contains both mud (1) and shells (17) is shown as • Values in a hierarchy are separated by a slash. A surface that contains a top layer of mud (1) and sub-layer of stone (5) is shown as | 1. Select the attribute. 2. Click browse ( The Create Enumerated List of Levels dialog box is displayed.
To position two or more values on the same level: 1. Select each value in the Choices list. 2. Click the left-arrow button. The values are moved to the Sublevels list. 3. Click +. All values are moved to Levels list. 4. Click Done. To create a hierarchy, 1. Select a value in the Choices list. 2. Click the left-arrow button. The values are moved to the Sublevels list. 3. Select that value and click +. The selected value is moved to the Levels list. 4. Repeat for each value in the list. 5. Click Done. To move a value from Levels list back to Choices: 1. Select the value. 2. Click - to move it to the Sublevels list. 3. Click the right-arrow button to move it to the Choices list. To move values up or down in the Sublevels or Levels lists, select the value and click the up- or down-arrow buttons. Click Reset to move all values back to Choices. |
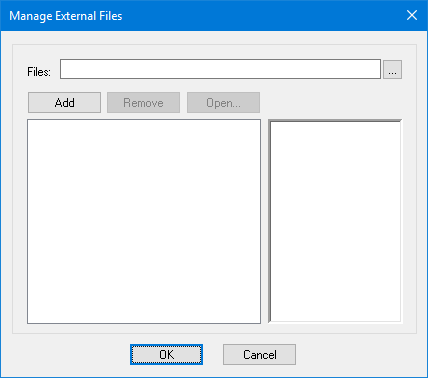
One or more external files, such as ext or multimedia files. | 1. Select the attribute. 2. Click browse ( 3. A Manage External Files dialog box is displayed.
4. Select a file using the Files option. 5. Click Add. The file is listed in the box on the left. 6. Repeat to select any other necessary files. 7. Click on a file in the list. A preview is displayed in the box on the right. You can also: • Click Remove to remove the selected file from the list. • Click Open to display the file in your system default viewer for that file type. 8. Click OK. You are returned to the Attributes window or dialog box. This file is copied to the If the attribute value is changed, the file is not removed from the The file in this folder is referenced when a product is created. The file name is added to the Attributes dialog box. |
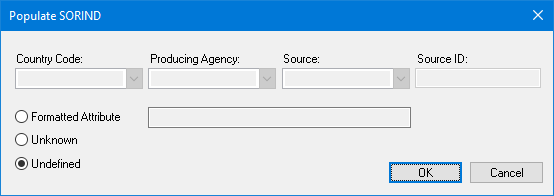
Attributes that can have an unknown or undefined value. | 1. Select the attribute. 2. Click browse ( The Populate dialog box is displayed.
3. Select one of the following options: • Formatted Attribute: Define the actual attribute. Change the options across the top. The formatted information is displayed. • Unknown: The value is unknown. • Undefined: The value is not defined. Options will vary based on the attribute being defined. 4. Click OK. |
 ).
).