Menu | Tools > Coverages > Clip Raster |
The Clip Raster command exports a defined portion of a raster coverage to a new *.csar file. All attribute bands present in the source dataset will be present in the resulting dataset.
Interface
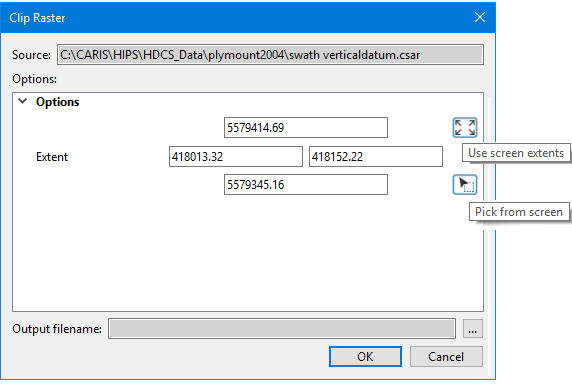
The Clip Raster command uses the following dialog box:
Option | Description |
Source | The input data for the process. The Source is defined by the surface that was selected at the time the command was initiated. This field cannot be changed. |
Extent | The extents of the input raster to be exported to a new raster coverage. There are three possible methods for defining the extents: • Manually enter the values in the Upper X/Y and Lower X/Y fields and specify the unit of measure for these values. • Click the Use screen extents button to use the full extents of the current view in the Display window. • Click the Pick from screen button and define a bounding box around the data to be included in the extents. The extents of the current view are selected by default. The values in the fields will be updated automatically if the extents are changed using either of the button options. These values are entered in the coordinate type and unit of measure of the coordinate reference system of the view, not the view settings defined in Tools > Options. |
Output filename | The name and location for the output file. |
Procedure
1. Select the root of the raster to be clipped.
2. Select the Clip Raster command.
The Clip Raster dialog box is displayed.
3. Define the Extents of the source to be included in the resulting coverage.
4. Specify a name and location for the output file.
5. Click OK.
A new raster coverage is created containing all data from the input raster within the specified extents.