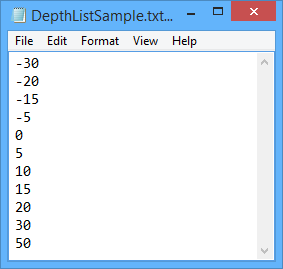
In this step of the Contour Wizard you will define the contour level options. Contours are created according to the elevation values in the source surface. You can have contours created at regular intervals in the elevation or you can load a file of predefined levels to have contours created at specific values. The following is an example of a contour levels file.
A sample list is provided when BASE Editor is installed. This file can be used, or you can make a copy of the file and edit it as needed. The sample list, DepthListSample.txt, can be found at:
C:\ProgramData\CARIS\BASE Editor\<version>\SampleData
Interface
Step 2 of the Contour Wizard uses the following dialog box.
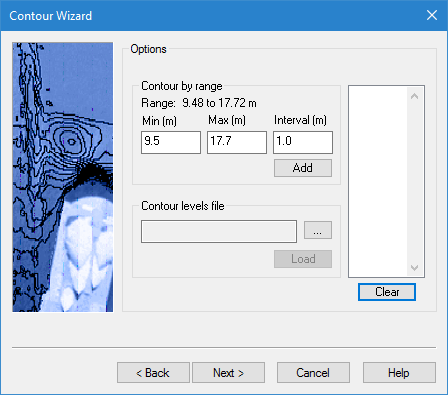
Option | Description |
Range | The range of elevation values present in the selected height source. When contouring by range, you can use the entire range, or you can specify a range of values for which to create contours. |
Min (m) | The minimum value to include in the range if contouring a specific range of values. |
Max (m) | The maximum value to include in the range if contouring a specific range of values. |
Interval | The frequency with which contours are created based on the elevation difference between each contour in the range of values. For example, you may wish to create contours at every 5 metres. |
Add | Click to generate the contour levels for the specified range and interval. The list box at the right will be populated with the contour levels. |
Contour levels list | The elevation values at which contours will be generated. Once the contour levels list is populated, a pop-up menu is available for the list. The following commands are provided: • Insert: Display the Add Contour Level dialog box to manually add a specific contour level to the list. This option is useful if a contour is needed at a specific level, but the level was not generated automatically. • Delete: Remove the currently selected level from the list. To delete multiple levels, press and hold <Ctrl> while selecting the levels and then select this command. • Save: Save the current contour levels list to a text file for future use with the Contour levels file field. Specify a name and location for the file in the Save As dialog box that is displayed. • Clear: Remove all current levels from the list. This functionality is also available through the Clear button. |
Contour levels file | Click the browse button to navigate to and select a contour levels file. The name and the location of the file will be displayed in the field. |
Load | Click to populate the contour levels list with the values from the selected contour levels file. |
Clear | Click to remove all values from the contour levels list. |
Procedure
1. Populate the contour levels list using one of the following methods:
• Enter values for Min (m), Max (m) and Interval (m) then click Add.
• Click the Contour levels file browse button (...) and select a file then click Load.
2. Click Next.