Menu | File > Export > Coverages > Raster |
The Export Raster tool can export a raster surface and its metadata to a number of different formats. The output can be either a raster surface or a raster image that records the georeferenced information within the file, depending on the format of the input. For example, if the input contains an image band and CSAR is selected for the output format, the resulting file will be a raster image. If the input had been an elevation band, the output would have been a raster surface.
The following output formats are available:
• BAG (surface)
• CSAR (surface or image)
• ESRI ASCII (surface)
• GeoTIFF (surface or image)
• JPEG (image)
• PNG (image)
• STL (STereoLithography file)
• USGS ASCII DEM (surface)
Metadata files can also be exported if exporting to the BAG format.
If exporting a digital elevation model (DEM) to an image format (such as JPEG, PNG, or GeoTIFF image), it must first be converted to a raster image. This is done using the Render Raster to Image command. See Render Raster to Image for information on this command. |
The Export Raster process is also available through the CARIS Batch command line tool and Process Designer. If using Process Designer, it is possible to apply clipping and tiling as a precursor step in the export process.
Related commands:
Interface
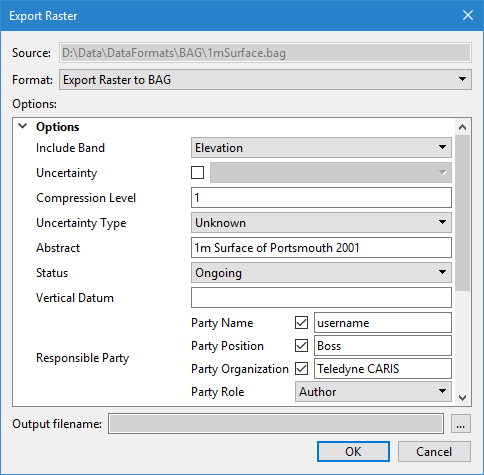
The Export Raster command uses the following dialog box.
Option | Description |
Source | The name and location of the input file. The Source is defined by the dataset that was selected at the time the command was initiated. This field cannot be changed. |
Format | The output format for the exported files. 1. Select an option from the drop-down list. If the BAG format is selected, the source dataset must have an elevation band. |
Options | The options for the selected output format. The available options will differ based on the selection in the Format drop-down list. If you hover the mouse cursor over the name of an option, a brief description of the option is displayed in a tooltip. If the BAG format is selected, options are provided for the BAG Metadata. These fields will be populated automatically using the existing values from the input. |
Output filename | The name and location for the resulting files. 1. Click the browse button (...) and specify a name and location. |
Procedure
1. Select a dataset in the Layers window.
2. Select the Export Raster command.
The Export Raster dialog box is displayed.
3. Select an output format from the Format drop-down list.
The USGS format supports only Geographic and UTM coordinate systems and a limited number of horizontal datums (NAD27, NAD83, WGS72, and WGS84). If the selected surface references an unsupported coordinate system or datum, the export will fail. UTM data must also be in the northern hemisphere to be valid for the USGS ASCII Grid format. |
4. Complete the necessary options for the selected output format.
5. Specify the name and location for the output file.
6. Click OK.
The export is started. The Output window will report start and end times for each format exported. Additional information about the export process may also be displayed in the Output window.
The output will be saved to the specified location.