Menu | File > Export > Coverages > Points |
Export the values from a coverage to a point cloud in a user‑specified format. The source coverage can be a raster surface, point cloud or variable resolution surface.
Interface
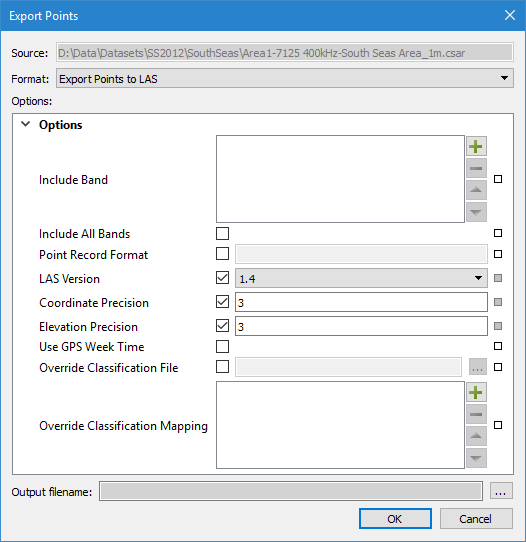
The Export Points command uses the following dialog box.
Option | Description |
Source | The name and location of the input file. The Source is defined by the coverage that was selected at the time the command was initiated. This field cannot be changed. |
Format | The output format for the resulting point cloud file. The options include CSAR and LAS. |
Options | The options for the selected output format. The available options will differ based on the selection in the Format drop-down list. If you hover the mouse cursor over the name of an option, a brief description of the option is displayed in a tooltip. |
Output filename | The name and location for the output point cloud file. 1. Click the browse button (...) to specify a name and location. |
Procedure: Export to CSAR
1. Select a coverage source in the Layers window.
2. Select the Export Points command.
The Export Points dialog box is displayed.
3. Select CSAR for the output Format.
4. Define any necessary Options.
5. Specify a name and location for the Output filename.
6. Click OK.
The data is exported to a new point cloud.
Procedure: Export to LAS
1. Select a coverage in the Layers window.
2. Select the Export Points command.
The Export Points dialog box is displayed.
3. Select LAS for the output Format.
The Include Band option can be used to map the bands of the coverage to relevant attributes in the LAS output file. This field can also be used to map status flags to relevant attributes of the resulting LAS file. For example, source points with a Rejected flag can be mapped to the LAS WITHHELD flag. If this option is not used, only the Depth and Status bands will be exported to the LAS file.
The Accepted status cannot be mapped through this option. Because this is the default state for points, it is not an actual flag to be mapped. |
4. Click the plus button ( ) for the Include Band option.
The Add Value dialog box is displayed.
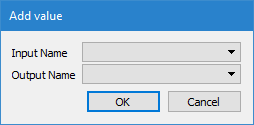
The Input Name field is used to identify the input band and status flag that you want to map. The list is populated with all bands and LAS flags present in the source file. Entries for flags are display as "band name:flag name".
The Output Name field is used to identify the LAS band to which the input data will be mapped in the output.
5. Select an option from each drop-down list.
6. Click OK to return to the Export Points dialog box.
7. Repeat steps 4 to 6 for each band you want mapped to the output file.
The Include Band list will be populated with the selected mapping settings, an example of which is seen below.

You can also choose to include all input bands in the output by enabling the Include All Bands option.
8. [Optional] Click the Include All Bands check box to enable the option.
The Override Classification File and Override Classification Mapping options allow you to export LAS data using a custom set of classifications rather than the default classifications defined in the specifications for the LAS version. The classifications can be specified either through a file, or by single mapping values. If an override classification file and override classification mapping are both specified, only the mappings are applied.
• A classification file must be in a text file format, such as TXT or CSV, and contain two columns, one for the classification ID number and one for the name of the classification. The two columns must be separated by a comma, or one or more spaces. If the data being exported contains an ID that is not present in the mapping file, the default classification for the LAS version will be used for that ID.
• Individual mappings are defined using the same method as the Include Band option.
Two mappings cannot be specified for the same classification ID number. |
9. [Optional] Define custom classification mapping for the export.
10. Define any other necessary Options.
11. Specify a name and location for the Output filename.
12. Click OK.
The data is exported to a new LAS file.