Menu | Create > New Feature Layer |
Tool |
|
Menu | Create > New Feature Layer |
Tool |
|
Create a new feature layer. You can use a feature layer to create new features or edit existing features.
You can copy existing features to a feature layer using the Import Selected Objects command.
You can save the contents of a feature layer using the Save command. By default the contents of the layer will be saved to a HOB file or an H2O file, depending on the catalogue of the layer. If the catalogue meets any of the following criteria, the layer will be saved as an H2O file, which is a CARIS feature-based format:
• the catalogue contains custom object acronyms that are longer than 6 characters
• the catalogue contains attributes with multiplicity, which is specific to S-100
• the catalogue contains information type objects, which is specific to S-100
• the data type of the catalogue is S-100
If you close a feature layer or exit from CARIS, you will be asked if you want to save the feature layer.
Interface
The Create Feature Layer command uses the following dialog box.
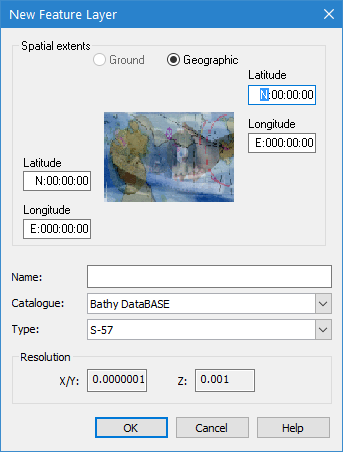
Option | Description |
Spatial extents | Define the extents of the feature layer. This section of the dialog box is only displayed if there is no data open in the application at the time the command is launched. If data is open, the extents of the view are automatically used as the extents for the feature layer. 1. Choose a coordinate type: Ground or Geographic. The labels change to reflect the type. 2. Type lower-left and upper-right values in the coordinate fields. |
Name | A name for the layer. Type in the box. |
Catalogue | Determines how data in the layer is defined. Select an option from the list. |
Type | The resolution type of the layer. Select an option from the list. |
Resolution | The XYZ values from the selected resolution type. This field is read-only. |
Procedure
1. Select the Create Feature Layer command.
The New Feature Layer dialog box is displayed.
2. Type a name for the layer.
3. Change any other necessary options.
4. Click OK.
A new data source is added to the Project window and a new layer is added to the Layers window. Once a feature is added to the layer, the layer can be saved. The layer icon changes colour to indicate that it has been saved.
