Menu | Database > Export Coverages from Database > Superselection/Selection |
The Export Coverages from Database command exports a copy of a coverage associated with a database object and its metadata from a database to your local machine. The result is a CSAR file for each selected database object and an XML file for the metadata of each coverage.
The file used to map metadata when exporting data from a database, bdbattributetransform.xsl, is located at:
C:\Program Files\CARIS\BASE Editor\<version>\modules\BASE Manager\support
If you have more than one database object selected, a file will be created for each one. Assuming the characters used in the name of each object being exported are valid, each export file will have the same name as the database object for which these files were created. If the object name contains one or more characters that are invalid for any of the types of files being exported, then these characters will be stripped from the names of all of the files being exported. For example, for a database object named "My:Coverage", the resulting files would be "MyCoverage.csar" and "MyCoverage.object.xml".
If a file already exists with the same name in the selected output folder, a number will be added to the file name. This number will be incremented each time a new file is created in the folder with the same name. For example, if a file named "MyCoverage.csar" already exists in the save location, the new file would be named "MyCoverage[2].csar". If you were to export yet another copy of this coverage, the next file would be named "MyCoverage[3].csar".
Interface
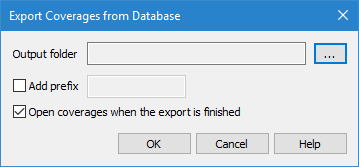
The Export Coverages from Database command uses the following dialog box.
Option | Description |
Output folder | The output directory for the resulting files. 1. Click the browse button (...). 2. Navigate to the desired location. 3. Click OK. |
Add prefix | Specify a prefix to be added to the beginning of filenames during export. This makes the exported files more easily recognizable and helps to avoid duplicate file names. 1. Click the check box to enable the option. 2. Type the prefix text in the field. |
Open coverages when the export is finished | Automatically open the new files open once the export is complete. This option is turned on by default. It is recommended that you turn this option off if exporting multiple surfaces because it can slow down the export. |
Procedure
1. Connect to a database.
2. Select the relevant database object layer in the Layers window.
3. In the Display window, select one or more coverages to export.
4. Select the Export Coverages from Database command.
The Export Coverages from Database dialog box is displayed.
5. Select the folder in which to save the files.
6. Define any other necessary options.
7. Click OK to perform the export.
The selected coverage(s) and its metadata are exported from the database to your local machine.