Menu | Create > Buffers |
Create a new feature using the geometry of an existing area plus a user-defined buffer. This command can be applied to selected areas or to all areas on a selected layer.
Related commands:
Procedure
1. Select the layer.
2. [Optional] Select one or more areas.
If you do not select any areas, all areas on the layer will be used.
3. Select the Create Buffers command.
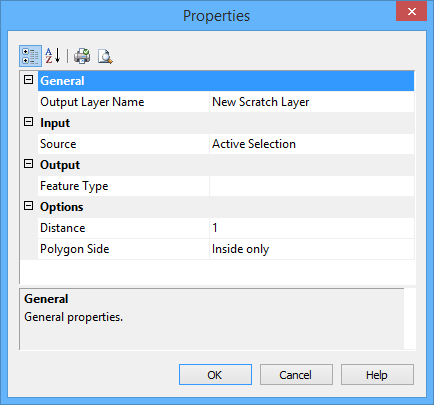
The Properties dialog box is displayed.
Option | Description |
General | |
Output Layer Name | The layer where the features will be created. This can be any open usage or scratch layer. 1. Select from the list. |
Input | |
Source | The features used to create the new areas. 1. Choose from: • <layer name>: All features on the layer are used. • Active Selection: Selected features are used. Not available if no features are selected, |
Output | |
Feature Type | The type of feature to be created. 1. Click browse (...). 2. Select an acronym and set any necessary attributes as described in Create. You are returned to the Properties dialog box. |
Options | |
Distance | The width of the buffer. The units are set in the Options dialog box. 1. Type a distance. |
Polygon Side | The location of the new area with respect to the existing area from which it is created. 1. Select from the list. |
The following tools modify the appearance of the dialog box:
Button | Description |
| Order the contents of the dialog box by category. |
| Order the contents of the dialog box alphabetically by name. |
| Print the current settings for the dialog box. |
| View a print preview of the current settings for the dialog box. |
4. Set the necessary properties:
• Output Layer Name
• Source
• Feature Type
• Distance
5. Click OK.
The buffer area is created.
Example
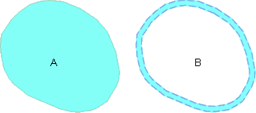
In this example, feature B is created from the geometry of feature A plus a buffer.