The Layers window lists all datasets, filtered layers, and external datasets that are open in the application. Many datasets have child layers. A CARIS file, for example, has separate layers for each feature type (polygons, lines, names, soundings, and symbols).
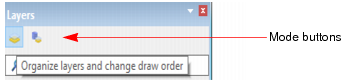
Data in the Layers window is displayed in two modes: Organize mode and Source mode. Each mode is displayed in a separate panel in the Layers window. The panels are activated by the mode buttons on the Layers window toolbar.
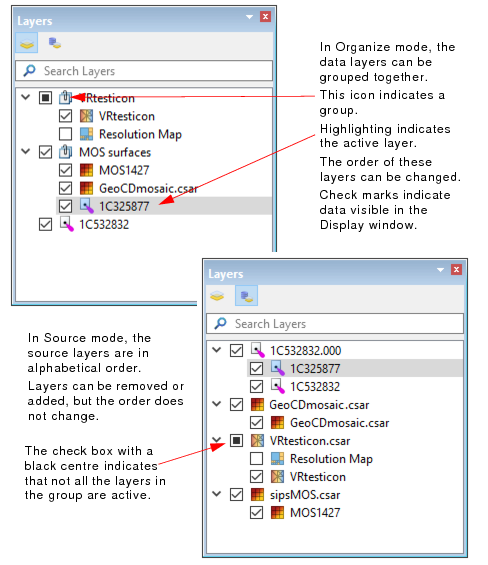
Data layers in Organize mode are not rigidly fixed to their sources. This enables them to be selected and re-organized in useful groupings.
Organize mode
The Organize mode is used:
• to determine what data is displayed, by activating the check box for a layer to include it in the Display window.
• to define the order in which data is displayed. By default the top layer in the list is drawn first, and every subsequent layer is drawn on top of the previous layer. (This direction can be changed using the Layer Draw Order option in the Tools > Options dialog box.) The draw order of an individual layer can also be changed by dragging the layer to a new position in the list.
• to organize data into groups, for example, to set common display properties for all items in a group. A group is a container for layers and for other groups. As a container, a group itself is not drawn in the Display window. However, it can be dragged to a new position in the Layers list, to change the draw order of its grouped layers relative to other layers and groups. A new group can be created from the New Group command on the right-click menu. (See New Group.)
• to customize the display of layers by setting properties for a selected layer or layers using options in the Properties window. (See Properties.)
• to rename layers to be more relevant to the work being done, using the Rename command on the right-click menu.
Source Mode
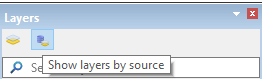
The Source mode lists all the sources for the open layers. These sources are grouped alphabetically (numerically first, then upper case then lower case). The order of this list is only changed by removing or adding a source. It is not affected by the grouping or re-ordering done in Layers mode.
The properties related to the source of the currently selected layer are displayed by clicking the Source Properties mode button  in the Properties window. See Properties for more information on this mode.
The images below indicate some of the differences between the Organize mode and the Source mode.
Search Layers
This field in the layers window can be used to filter the layer names to find specific layers in large data sets with many layers. The filter is activated when text is typed in the Search Layers field. The Layers window will display the layer (or layers) that match the text, and highlight the matching text.
• If the filtered layer is in a group, the layer and the group it belongs to are displayed.
• If the filter matches a group, then all the layers in the group and the group layer itself are displayed.
You can clear the search field by clicking the X in the field.
Visibility
A check mark in the box beside a layer name indicates the layer can be visible in the Display window. If the check box is empty, the layer is hidden from the Display.
Tools for organizing layers are found on pop-up menus displayed when you right-click on a layer in Organize mode. The layer also becomes the active layer. The menu items that appear in the pop-up menu will differ depending on the level and type of data layer selected.
These commands are described below.
Command on context menu | Description |
Add Layer(s) | Layers can be added to the window using various filtering commands that differ depending on the type of data. The Add Layer command on the right-click menu launches any of the following filter methods: • Create Layer by Feature Acronym • Create Layer by Feature Object ID • Create Layer by Feature Type • Create Layer by Unique Feature Acronyms • Create Layer by Rule File For certain types of data layers, a band, bounding polygon or resolution map layer can be added from the Add Layer command. For data formats such as shapefile, or for databases, a layer can be added using Add Layer by Filter or by Classification. See Filter and Classification. |
Set (Unset) as Snap/Grab Target | Designate the selected layer as the target layer containing the vertices to which you will snap when selecting data. See Set As Snap/Grab Target. |
Use Coordinate Reference System | |
Zoom to Source | |
Rename Layers | Any layer can be renamed. To rename a layer: 1. Double-click on the layer. This changes the layer name to an editable field. 2. Type the new name for the layer. 3. Click outside the layer to close the edit field. |
Group | |
Duplicate | Layers can be added using the Duplicate function, which automatically creates a duplicate of the selected layer, and displays it as a new layer in the as “ |
Remove Layer | Remove a layer from the list in the Layers window. If a layer is removed from the list in Organize mode, it will still be visible in Sources mode. If a layer is removed from the list in Sources mode, it is removed from both modes. |
Close Source | Close the |