![]()
The Database Attachments command allows you to link files to a survey or surfac object in a database. The attachments can be in any format. Once linked, all attachments for the selected object will be listed in the dialog box when the command is accessed. These attachments can be opened, downloaded or removed by users with the necessary privileges.
To attach a file to a database object:
1. Connect to a database.
2. Select the relevant database query layer in the Layers window.
3. Select a database object in the Display window.
Menu | Database > Attachments |
4. Select the Database Attachments command.
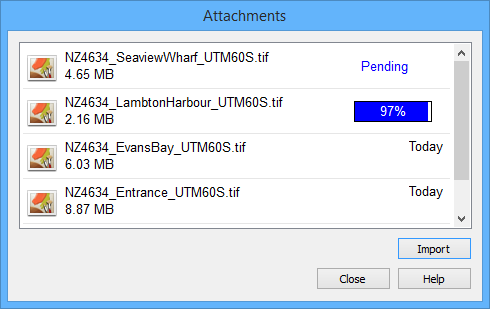
The Attachments dialog box is displayed.
![]()
The dialog box is empty if the selected object does not have any attachments associated with it.
5. To select the file(s) to attach, click Import.
A Select Files to Attach dialog box is displayed. You can attach multiple files in multiple formats in a single use of the command.
6. Select the files you want to attach to the object and click Open.
The files will be listed in the Attachments dialog box with a progress bar for each file being loaded.
If the files are small in size, the load may complete before the progress bar is displayed. |
As the files are attached, they will be saved to the root folder (node location) of the database. When complete, the attachments remain listed in the dialog box with the date they were added.
7. When you are finished, click Close.
Attachment Options
Other users can access attachments if they launch the command with a database object selected that has attachments. When the dialog box opens, a pop-up menu provides the following commands:
• Export: Use this command to download an attached file(s) to your computer. This command displays a Browse for Folder dialog box that allows you to choose the location for the file.
• Open: Use this command to open a file(s) locally using the applications on your computer. The file(s) will be saved temporarily to the default Windows Temp folder.On Windows 7 this is: C:\Users\<username>\AppData\Local\Temp
• Delete: Use this command to delete the selected attachment from the database. You will be asked to confirm the deletion before it is performed. The file will then be removed from the root folder of the database and will no longer be associated with the surfac object.
• Select All: Use this command to select all files listed in the dialog box. Once selected, the other pop-up menu commands can be used.
1. Select one or more attachments.
2. Right-click an attachment to access the pop-up menu.
3. Select the desired command.