Data can be draped over other data to better view the details of the data. In the 2D view, a raster image can be draped over a raster dataset. In the 3D View, both raster images and vector data can be draped over a raster dataset. The properties and procedure used for draping differ depending on the data formats.
Draping Images
To drape raster images over raster data.
1. Click the check box of a raster data layer in the Layers window.
2. Click the check box of an image layer in the Layers window.
3. Select the raster data layer in the Layers window.
4. Select the Drape property in the Properties window and select the relevant image layer from the drop-down list.
The image is draped over the data.
To remove the draped layer:
1. Select the Drape property again and select (None) from the drop-down list.
Draping Data
To drape vector data over raster data:
1. Click the check box of a vector data layer in the Layers window.
2. Click the check box of a raster data layer in the Layers window.
3. Select the vector data layer in the Layers window.
4. Under Drape in the Properties window, select the Method property.
There are three options provided:
• None: Data is displayed according to the Default elevation property. With this option, all vector data is on a level plane unless the data contains its own Z value.
• Drape: Drape data over a surface to get an accurate view of contours and other vector data.
• Drape (use line splitting): Data is draped using the same values as the Drape method, but line segments are adjusted in length based on the Max segment length property. A larger segment length has fewer vertices, resulting in faster processing times. A smaller segment length has a greater number of vertices, resulting in slower processing times but a more accurate representation of the elevations
5. Select an option from the drop-down list.
The vector data is draped over the raster data.
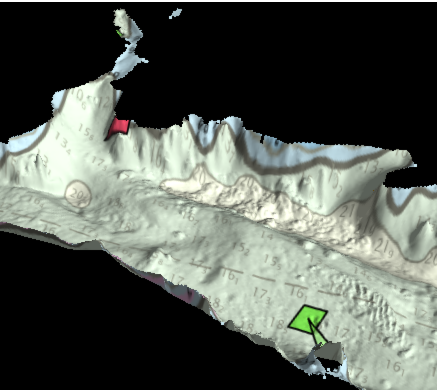
When draping vector data, the Offset property can be used to display the vector data at a specific height above the raster data. Also, the Clip to Terrain property can be used to only display the vector data that is within the extents of the raster data. This property is set to True by default. Below are examples of a raster surface with an ENC draped over it; one with Clip to Terrain set to False, one with Clip to Terrain set to True.
Clip to Terrain: False
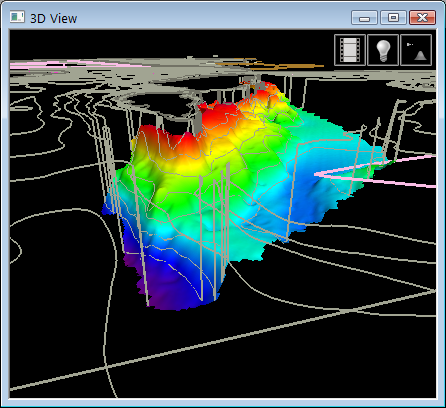
Clip to Terrain: True
