Menu | Tools > Surfaces > Tile Raster |
Pop-up | coverage root > Tile Raster (Layers window) |
The Tile Raster process exports a single raster to one or more raster files based on the defined tiling scheme. The resulting raster files will be in the .csar format.
Interlace
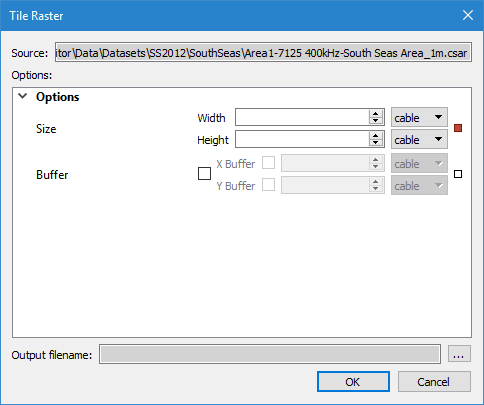
The Tile Raster command uses the following dialog box.
Option | Description |
Source | The input data for the process. The Source is defined by the surface that was selected at the time the command was initiated. This field cannot be changed. |
Size | The size of the tiles to be exported. 1. Use the Up or Down arrow buttons or manually enter a value for the Width and Height of each tile. 2. Select the unit of measure for each measurement. |
Buffer | The size of a buffer around exported tiles. X Buffer defines the size of the buffer on the left and right of each tile. Y Buffer defines the size of the buffer on the top and bottom of each tile. 1. Click the check box to enable the Buffer fields. 2. Click the check box for X Buffer to enable those fields. 3. Specify a size and select a unit of measure for the X Buffer. 4. Click the check box for Y Buffer to enable those fields. 5. Specify a size and select a unit of measure for the Y Buffer. |
Status Indicators
| Each option has a status indicator box beside the field. If the field has not been populated, or is populated with a default value, the box is coloured white. When a value is entered or a default value is changed, the status indicator box changes to grey to indicate it is no longer in the default state. If an option is mandatory and has not been populated, the status indicator box is coloured red. Fields can be returned to their default state by clicking the status indicator box and selecting “Reset”. |
Output filename | The name and location for the resulting tiles. The tiles are named based on the provided output name, with the row and column of the tile encoded into the name, such as outputfile2x3 for the tile in the second row and third column. |
Procedure
1. Select the root layer of the raster to be tiled.
2. Select the Tile Raster command.
The Tile Raster dialog box is displayed.
3. Specify the Size for the tiles to be exported.
4. [Optional] Specify the Buffer settings for the tiles to be exported.
5. Define a name and location for the tile files.
6. Click OK.
The raster is divided into tiles based on the specified dimensions and those tiles are saved as .csar files in the specified location.
