The 3D View command is used to enable or disable the 3D View, which provides a three-dimensional view of data.
No data is displayed when you first enter 3D View. You choose the data to display by turning layers on in the Layers window. Any open layers that can be viewed in 3D are enabled in the Layers window. Since draw order does not apply in the 3D View, the Draw Order window will be blank. If the normal 2D Display window is selected, the Layers and Draw Order windows will return to their normal behaviour for the 2D view.
1. Turn on one or more layers.
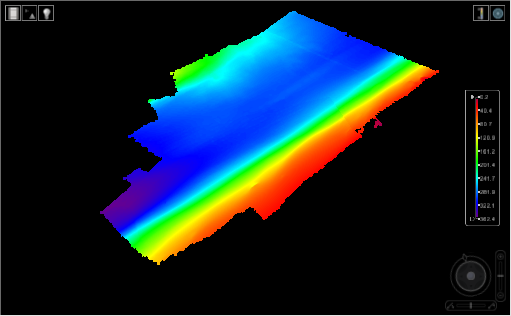
The selected layers are displayed in the 3D View.
Moving your mouse over the data will cause a tooltip to appear, providing the name of the source and the value at the current location based on the selected layer. The coordinates of your current location are displayed in the status bar. Also displayed in the status bar is the depth value for the surface based on the camera depth.
If you have background images to accompany the data, they can also be displayed in the 3D View.
2. In the Layers window, click the image layer check box.
The selected image is added to the display.
When you select a layer in the Layers window, its properties are displayed in the Properties window. Although all properties are displayed, only those relevant to the 3D View will be enabled. Adjusting these properties changes the 3D view.
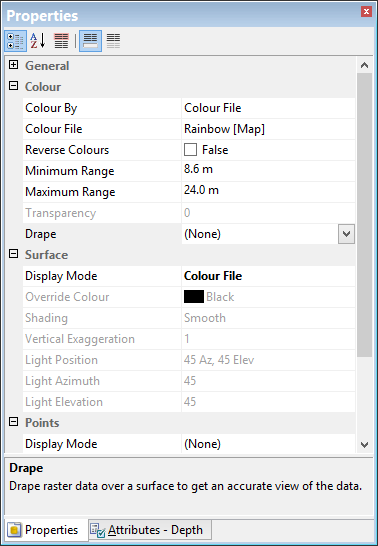
A brief description and instruction is provided for each property in the Description panel at the bottom of the window.