Essential AML product information.
Interface
Option | Description |
|---|---|
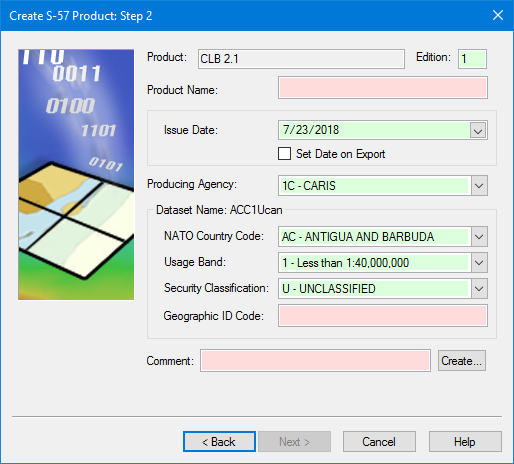
Product | [Read only] The product type selected in the previous step. |
Edition | The start number for editions. This defaults to 1. Change this if necessary by typing a new number in the box. |
Product Name | The name for the product. The product name does not have to follow standard AML naming conventions. Type in the box. |
Issue Date | • Issue Date: The date for the product. Select a date by clicking the down arrow to display a calendar. • Set Date on Export: • On: Apply the export date to the product. The Issue Date field is inactive. • Off: Apply the date in the Issue Date field. |
Producing Agency | A two-digit code indicating the country of origin. Select from the list. |
Dataset Name | The name of the dataset is a combination of the options inside the Dataset Name frame. The name is displayed in the frame title as you select the options. • NATO Country Code: Text placed at the beginning of the dataset name. Select from the list. • Usage Band: The purpose and scale for the new dataset. Select from the list. • Security Classification: The government-authorized security clearance required by the person who will use the chart. Select from the list. • Geographic ID Code: A user-defined number that uniquely identifies geographic area of the generated dataset. Type in the box. |
Comment | A mandatory field that contains the standards of protection required for the data. 1. Type a Comment or click Create. The Create Comment dialog box is displayed.
As you define the options, the comment is displayed in the Formatted Comment box. Options: • IDD Status: The status as defined by the International Defence Organization. If you define this, the Caveat option becomes in active. Select from the list. • Protective Marking: The classification code or minimum standards of protection for the data. Select from the list. • Owner Authority: This is derived from the country code. Select from the list. • Caveat: The clearance level for viewing data with a Confidential level or greater. This field is not available if an IDD Status is set. 2. Set any necessary options. 3. Click OK. You are returned to the Step 2 dialog box. The formatted comment is inserted in the Comments field. |
Procedure
1. Define the mandatory options.
2. Define any other necessary options.
3. Click Next.
