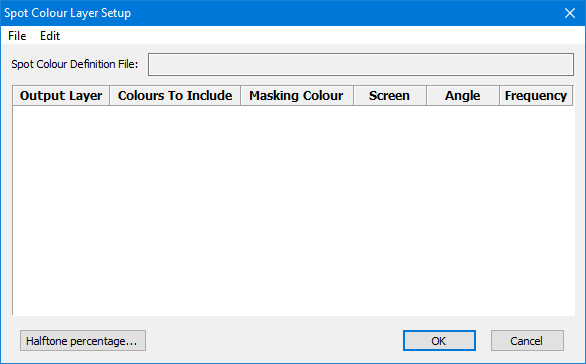
If you clicked Browse in Spot Configuration, the following dialog box is displayed for creating or editing a Spot Colour Definition file.
Open file
1. To open an existing file, select File > Open.
2. Select the Spot Colour Definition file.
The file name and path are displayed the Current Spot Colour Definition File field.
The spot definitions in the file are listed in the dialog box.
New file
1. To create a new spot colour definition file, select Edit > Insert.
A new row for a spot colour definition is inserted.
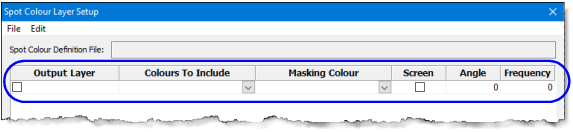
2. Select the check box in the Output Layer field, and type a layer name.
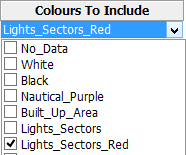
3. Click in the Colours To Include field, and select one or more colours from the drop-down list.
The default colour list contains colour tokens from the ih_colour.xml file.
Sometimes, a masked area overlays another feature in the chart (for example, an area for diagrams).
The Masking Colour option sets the colour that is used to hide features from another layer.
4. Select one or more masking colours by selecting the check boxes in the list.
Colours can be rendered either as solid colours or as dots that are spaced at specific angles and densities for printing.
5. Select the Screen check box to render colours as dots.
If Screen is selected, the Angle and Frequency options are active.
• Angle determines the angle that the colour dots for final printing are placed.
• Frequency determines the density of the colour dots per inch.
6. Type the Angle and Frequency values in their respective fields.
7. Select Edit > Append to place a new row below the selected row, or select Edit > Insert to place a new row above the selected row.
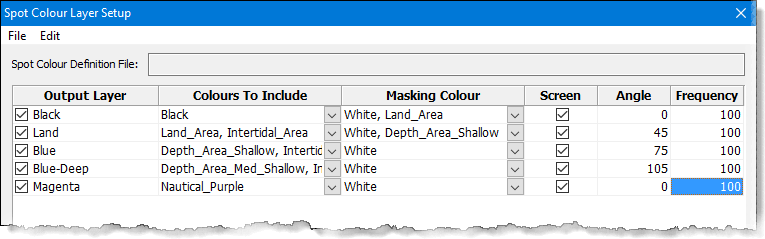
Your selections are displayed in the Spot Colour Layer Setup dialog box.
8. To remove a row, select the row and select Edit > Delete.
9. Select File > Save As to save settings to a new Spot Colour Definition file, or select File > Save to save an existing Spot Colour Definition file.
10. Click OK to close the dialog box.
These settings will be applied when the chart is exported to a spot separates file.