Menu | Tools > Surfaces > Filter |
Pop-up | Filter |
Create a new surface (coverage) containing nodes from a raster surface or point cloud that meet the criteria of a user-specified filter.
The new coverage will contain all of the bands present in the source coverage, but with the filter Boolean expression applied to limit which nodes are populated. Typically, all bands are populated in the same areas after the filter, in locations where the values of the referenced bands pass the expression criteria.
See Filter Expressions for information on expressions.
The new coverage is created in memory only and will be lost when the application or the layer is closed. If you wish to retain the new coverage, it can be saved to a CSAR file using the Save As command. See Save As for information on the command.
When the dataset is saved, a new bounding polygon will be created for the data and a Bounding Polygon layer added to the layers list.
Interface
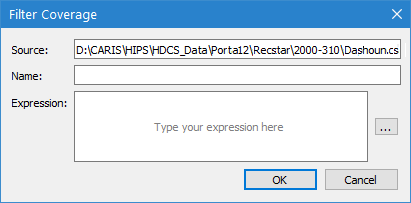
The Filter command uses the following dialog box.
Option | Description |
Source | The source coverage to be filtered. This field is populated with the coverage that was selected at the time the command was initiated and cannot be changed. |
Name | The name to assign to the new coverage. |
Expression | The filter expression to apply to the source data. 1. Click the browse button (...) to launch the Expression Builder dialog box.
This dialog box is used to create a filter expression by typing in the expression field or selecting options from the Bands list and the operator buttons. The expression field also provides the following functionality to assist in expression creation: • Auto-complete options are displayed as you type in the expression field, based on the attributes in the source data. The arrow keys and/or the <Enter> key are used to select an auto-complete option. Entries added using auto-complete will be enclosed in quotation marks to ensure spaces and special characters in the band names do not cause the expression to be invalid. • Values that are specific to the source data, such as attribute band names, are coloured differently from the rest of the expression. • If the expression contains parentheses, selecting a parenthesis causes that character and the matching parenthesis to be highlighted, making it easier to distinguish between different levels of parentheses. 2. Double-click the name of the band that you want to filter, or type it into the expression field. 3. Use the keyboard or the buttons in the dialog box to add the operators and values to build the filter expression. 4. Click OK when finished to return to the Filter Raster dialog box. The Expression field is populated with the defined filter expression. If filtering LAS data, string values must be enclosed in single quotes in the expression. For example, to filter Classification data with the value of “Water”, the expression would be Classification = ‘Water’. |
Procedure
1. Select a raster surface or point cloud in the Layers window.
2. Select the Filter command.
The Filter Coverage dialog box is displayed.
3. Enter a Name for the resulting coverage.
4. Click the browse button (...) to launch the Expression Builder dialog box and define the expression for the filter. Click OK to close this dialog box and return to the Filter Coverage dialog box.
5. Click OK.
A new coverage is added to the layers window with the filter applied to the relevant band.
6. If needed, select the Save As command to save the coverage for future use.
Menu | File > Save As |
Pop-up | temporary dataset > Save As (Layers window) |
